Creating your AutoScaled Account
AutoScaled supports three ways to register and sign in to the platform:- Google OAuth: Click “Google” to authenticate with your Google Account. This is the recommended method, since you’ll need Google Drive connected to generate and access presentations.
- Microsoft OAuth: Click “Microsoft” to authenticate with your Microsoft account
- Email & Password: Register with an email address and password. You’ll receive a verification email before you can access the applications.


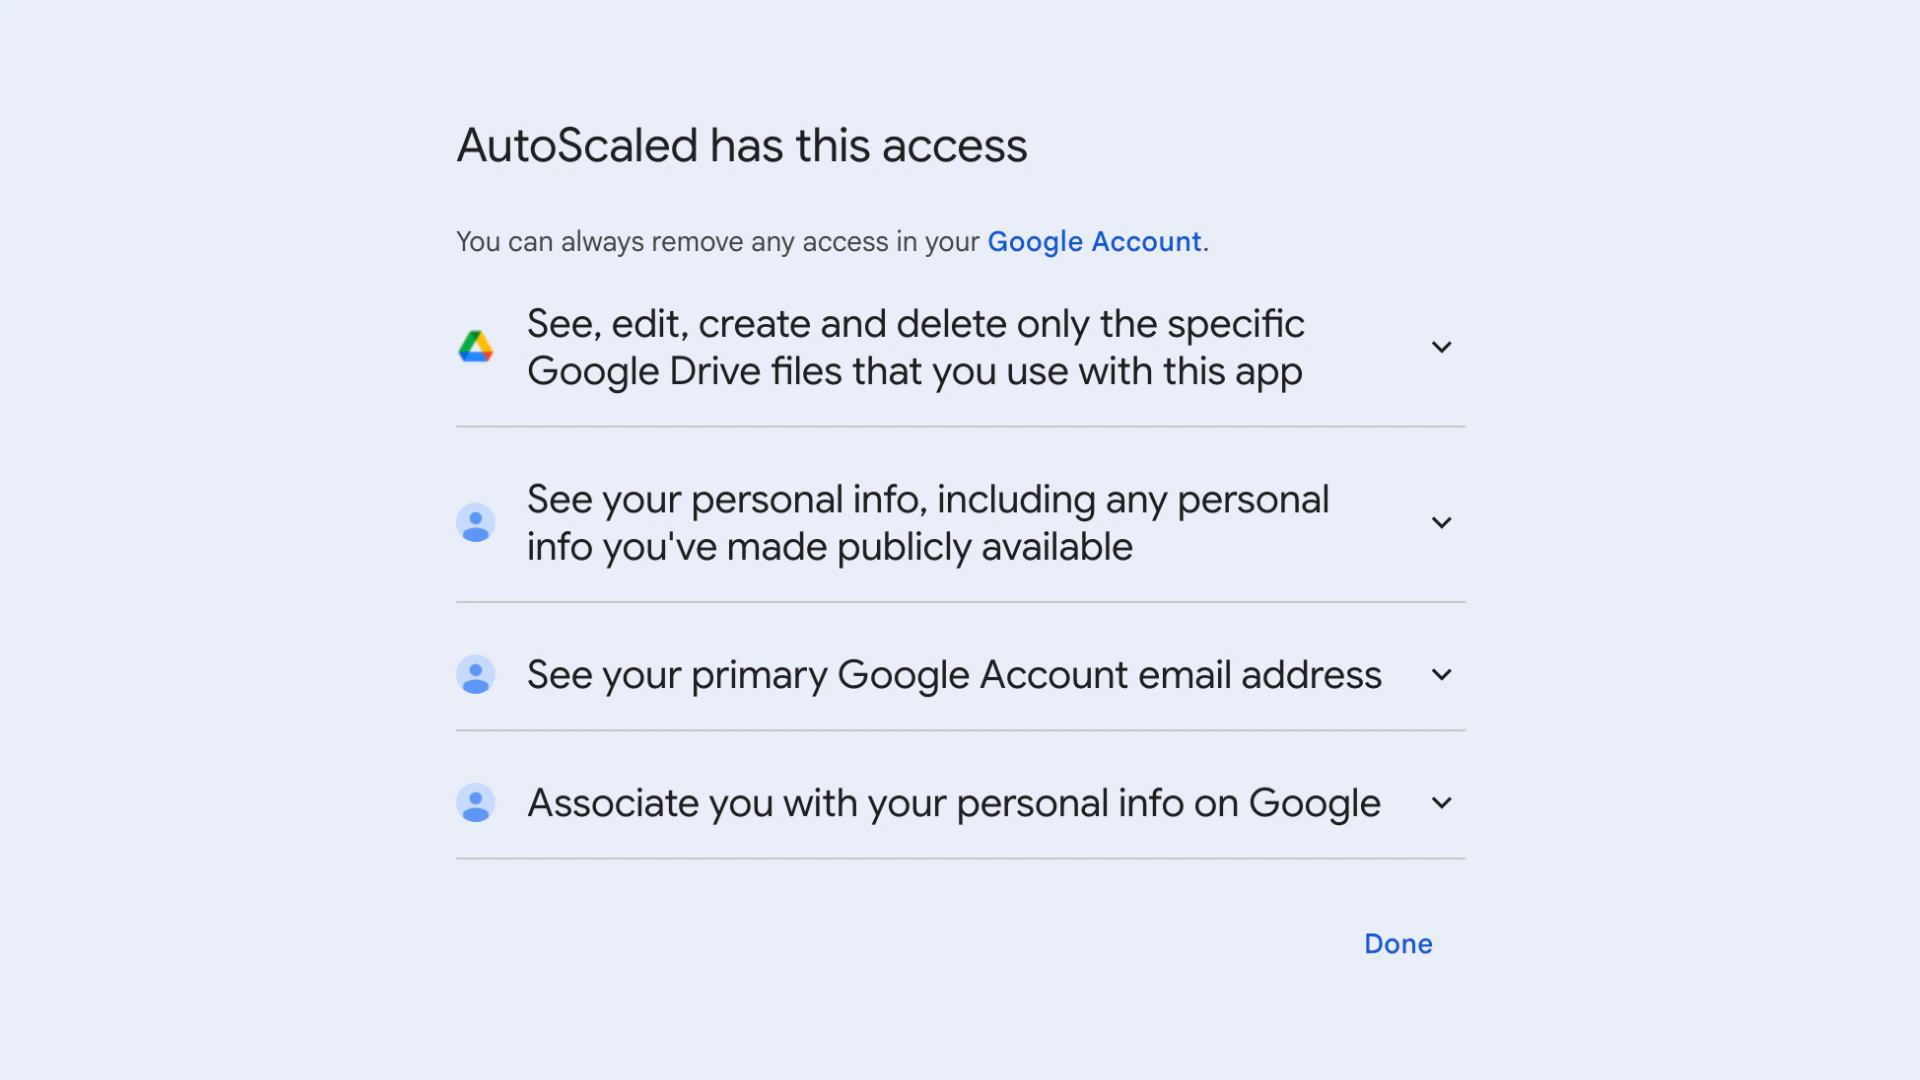
AutoScaled OAuth permissions
When utilizing Google or Microsoft as your main registration and login method, AutoScaled will request a few permissions in order to optimize your experience. AutoScaled follows the Principle of Least Privilege - minimizing access to what’s absolutely necessary. There are two main categories of permissions requested:- Associate you with your personal info on Google or Microsoft: granting AutoScaled access to your name, email address, language, profile picture and other information you’ve made public to set up your profile. This is required to set up your profile and authentication through Google or Microsoft.
- See, edit, create and delete only the specific Drive files that you use with this app: granting AutoScaled permission to create new files or change existing files you give explicit access to (individually) while using the app. This is required to run AutoScaled with the Google Drive or Microsoft integrations.
Referral codes
Referral codes are codes provided by existing users. Existing users can either share a:- Referral link: this will auto-fill the referral code section in the registration form
- Referral code: this code can be added by new users during registrations
AutoScaled Onboarding
When registering the first time on AutoScaled, you are asked to complete an onboarding flow. The onboarding flow takes about 60 seconds and helps us personalize your experience. It’s a three-step wizard:Onboarding Step 1 — Your Name & Pain Points
Enter your name and select the challenges you’re looking to solve (e.g., manual deck creation, inconsistent branding, time-consuming updates, etc.). When you sign up using Microsoft or Google your name might be prefilled.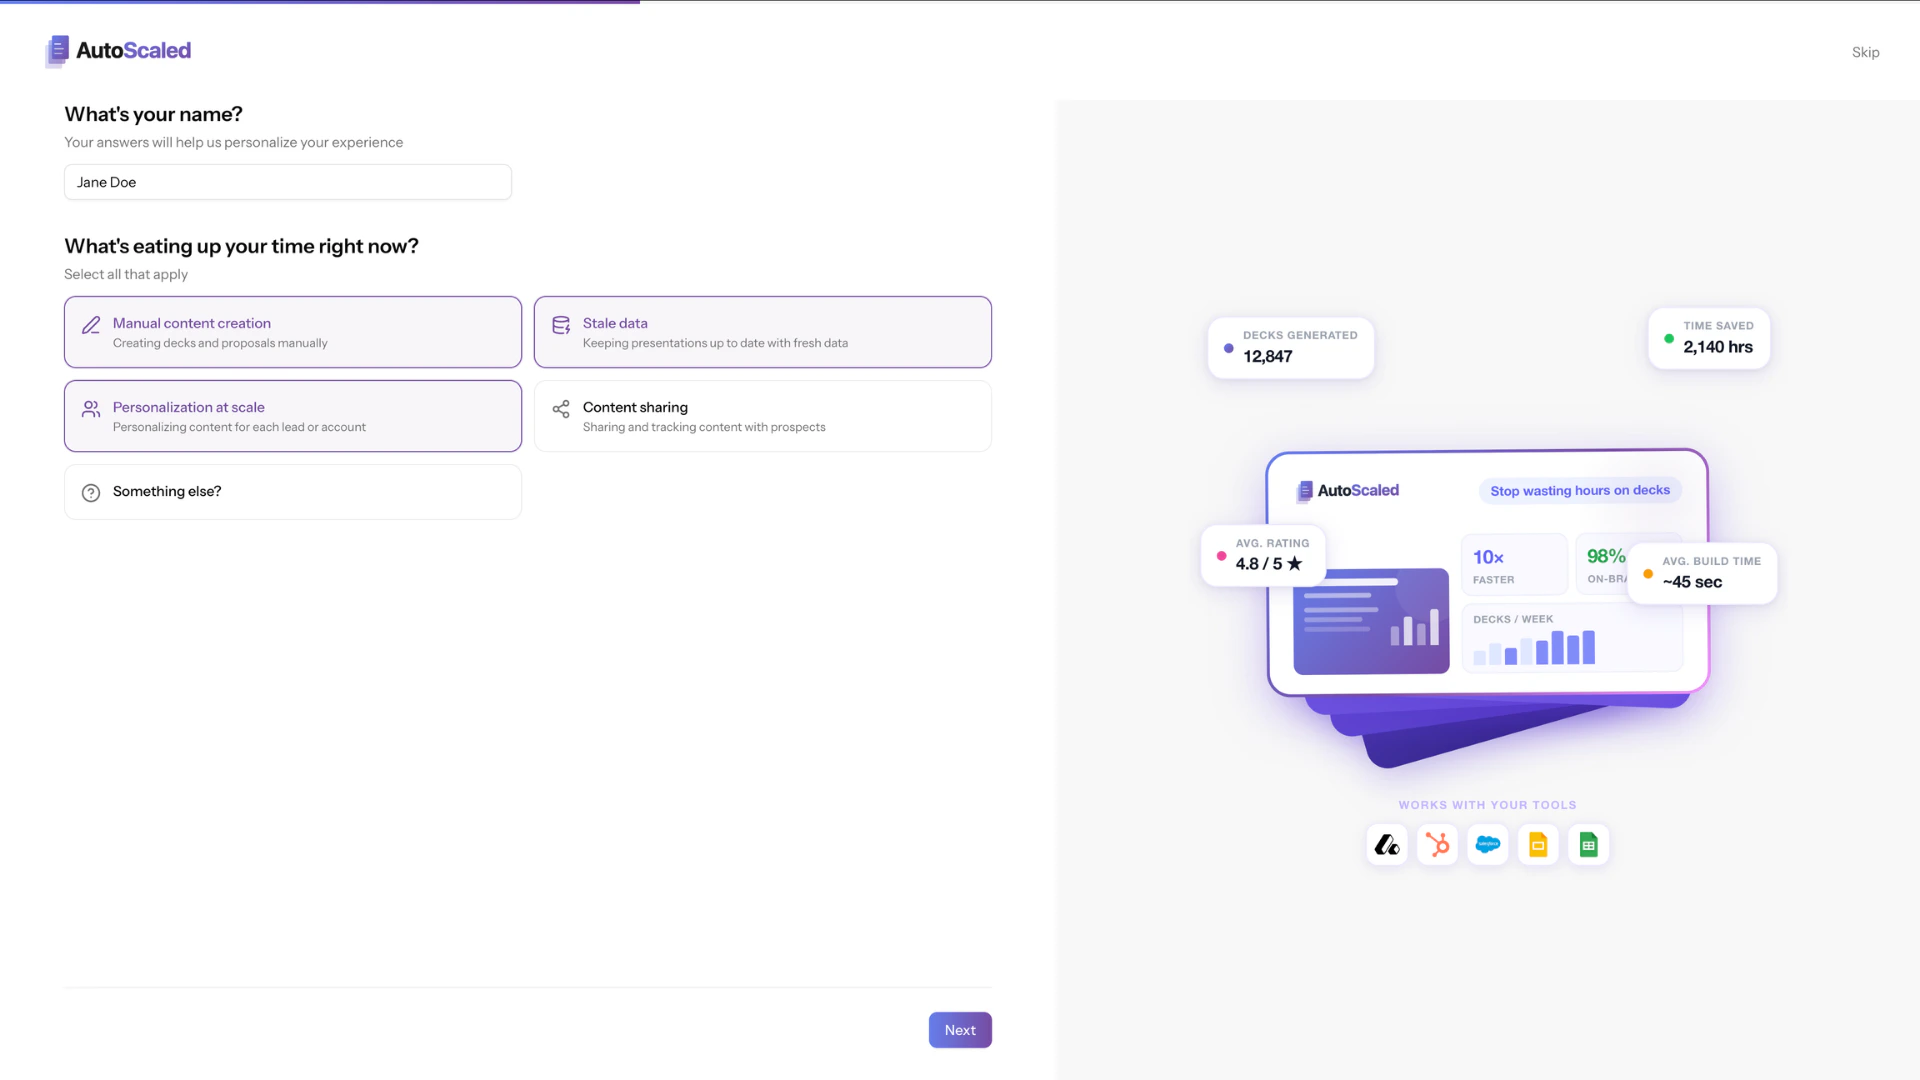
Onboarding Step 2 — Role & Company
Choose your role, industry, and company size. This helps us tailor templates and recommendations specifically for your use case.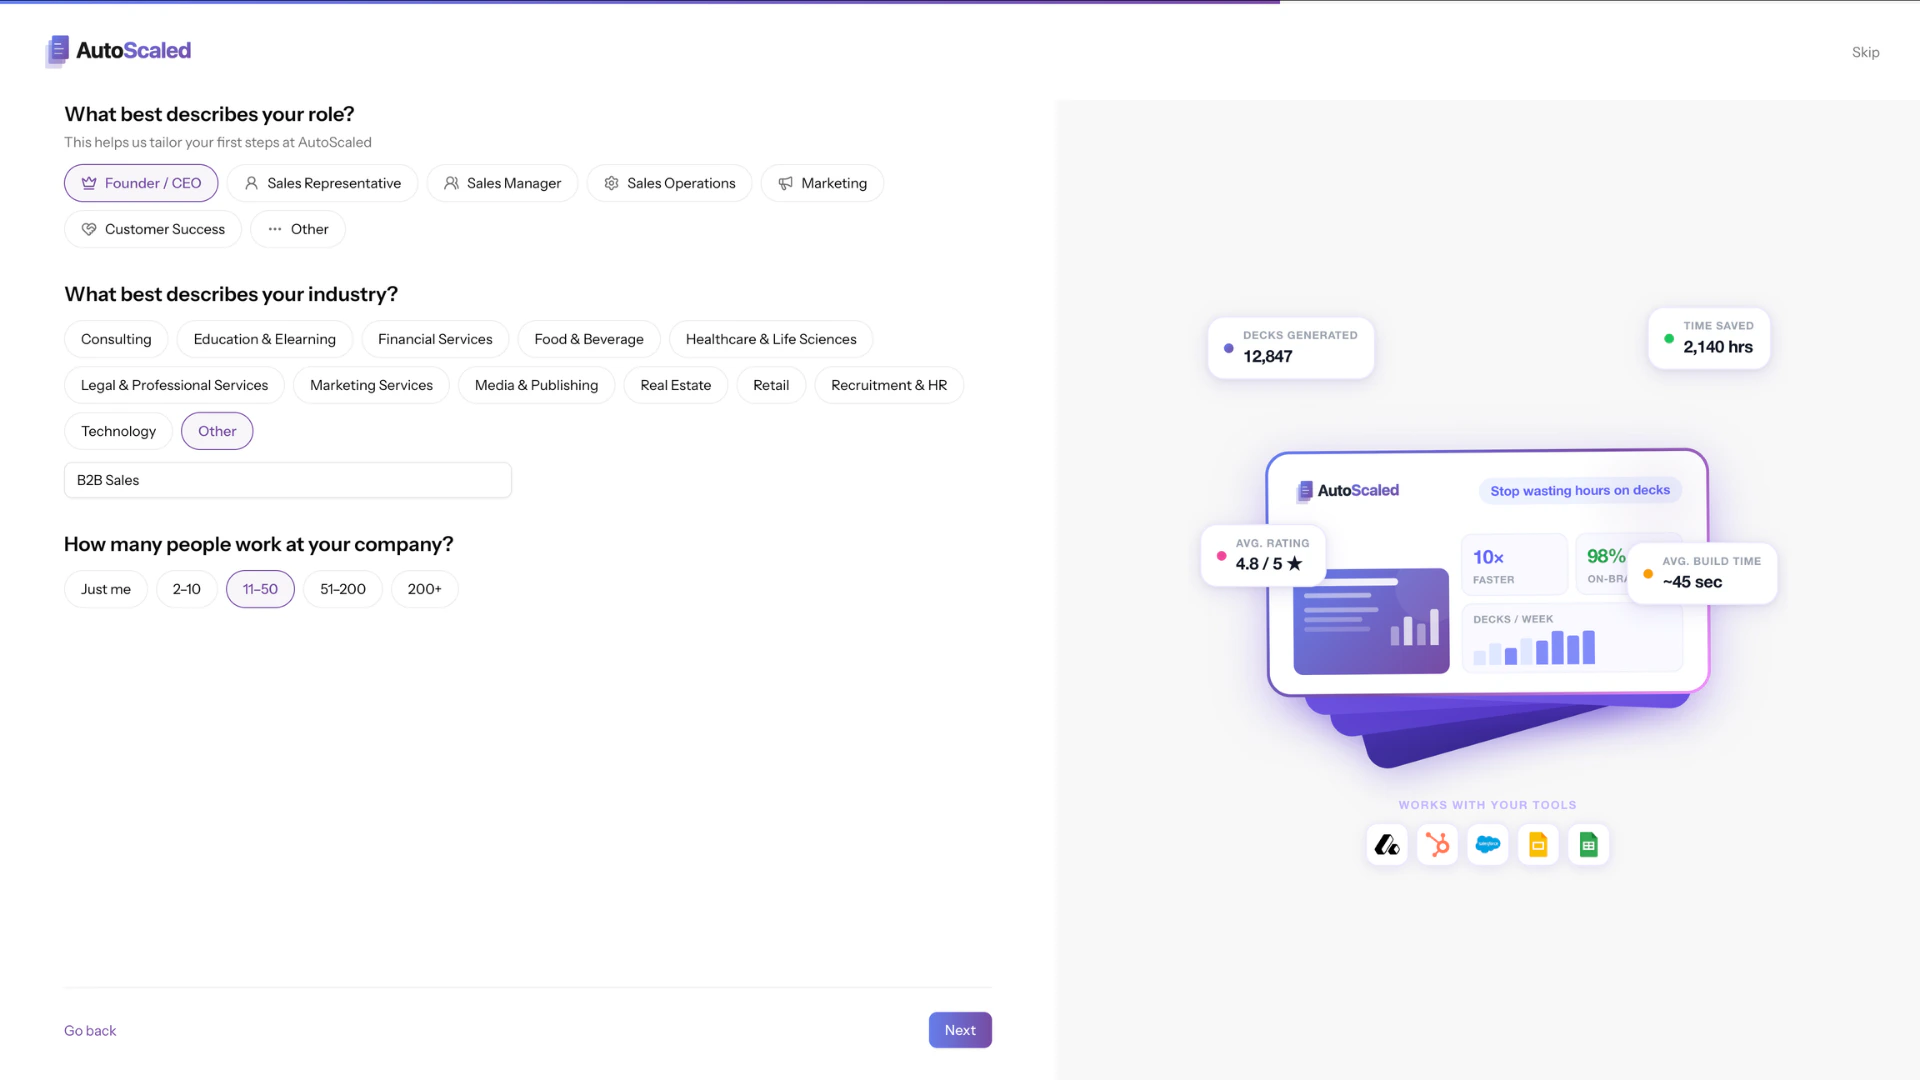
Onboarding Step 3 — Content Types & Referral
Select the types of presentations you plan to create (sales decks, QBR presentations, onboarding decks etc.) and let us know how you found AutoScaled.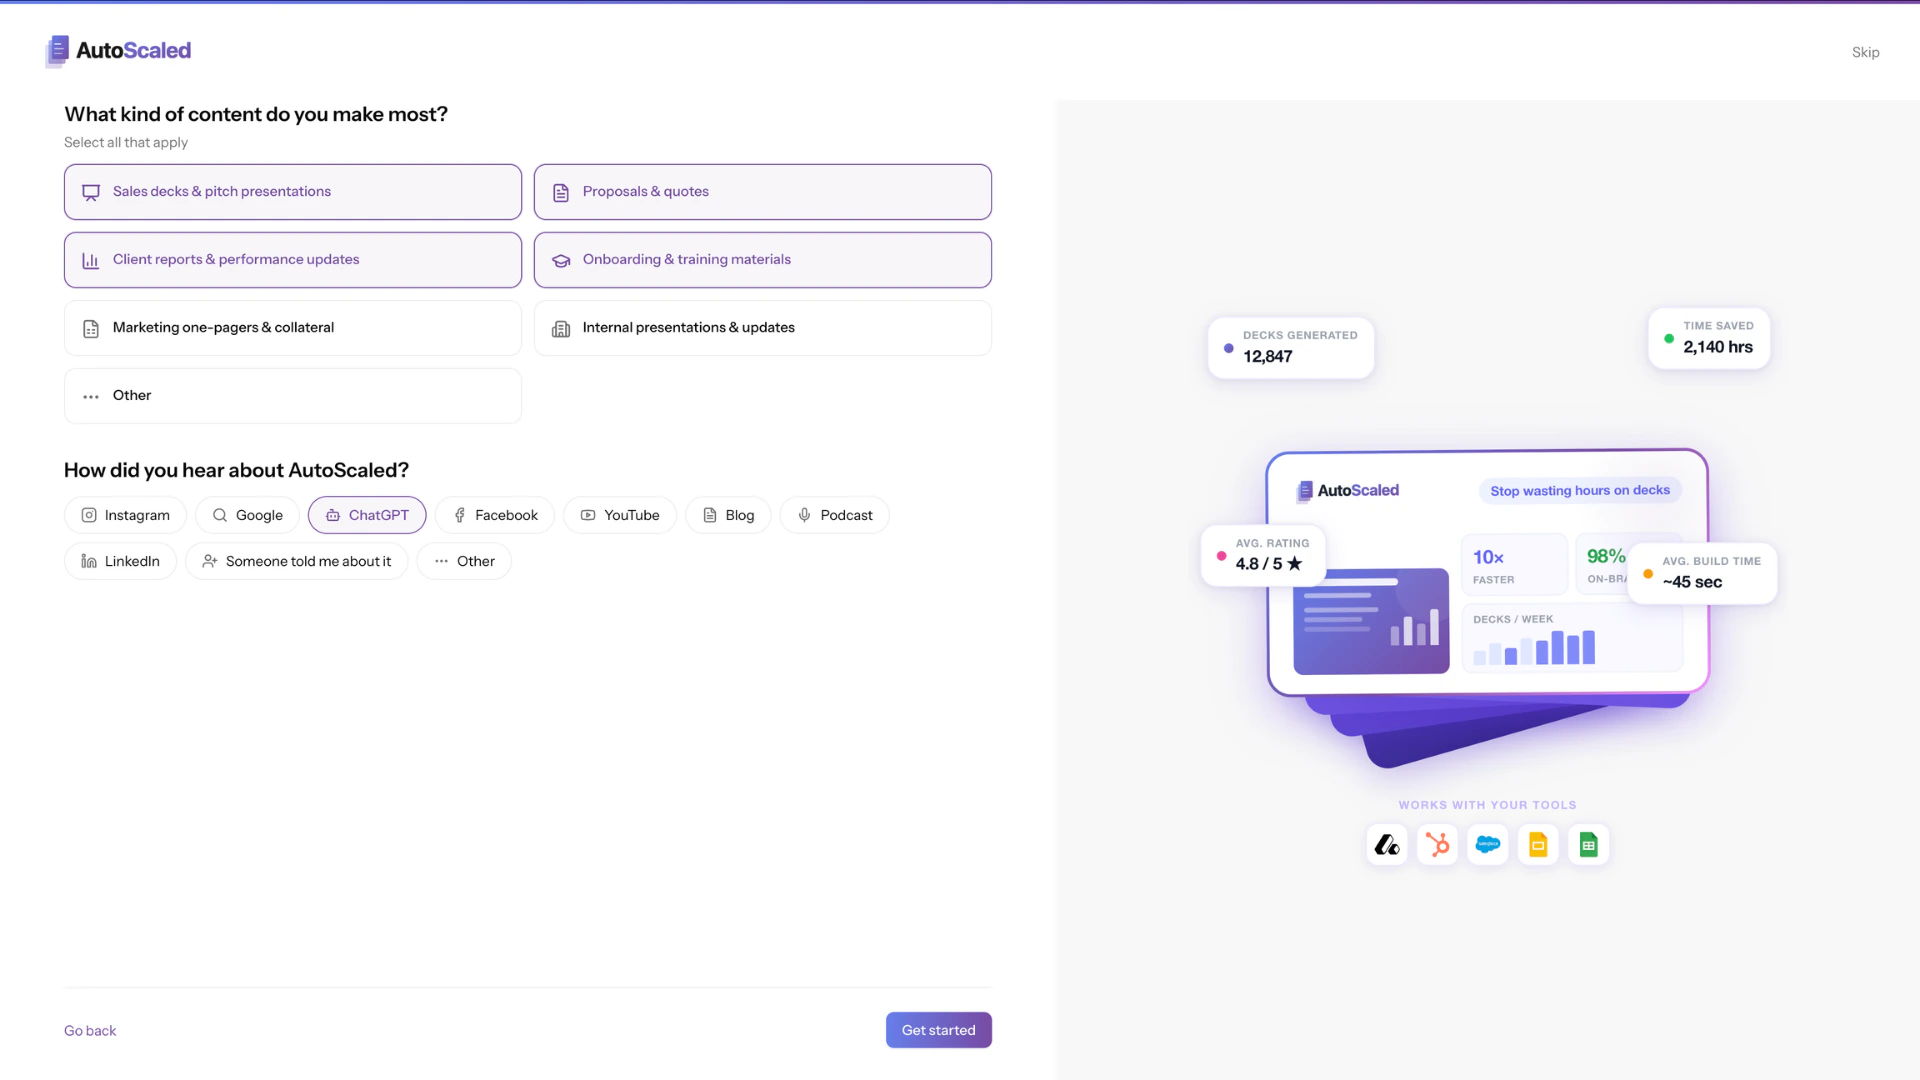
Skipping the Onboarding Wizard
We understand you might want to skip the onboarding process and get started with AutoScaled straightaway. During each onboarding step you can click on the “skip” button in the top right corner to bypass onboarding. This will make your experience less personalized. If you wish to update your details in a later stage, you will have to do this manually through the user settings. We highly recommend not to skip onboarding.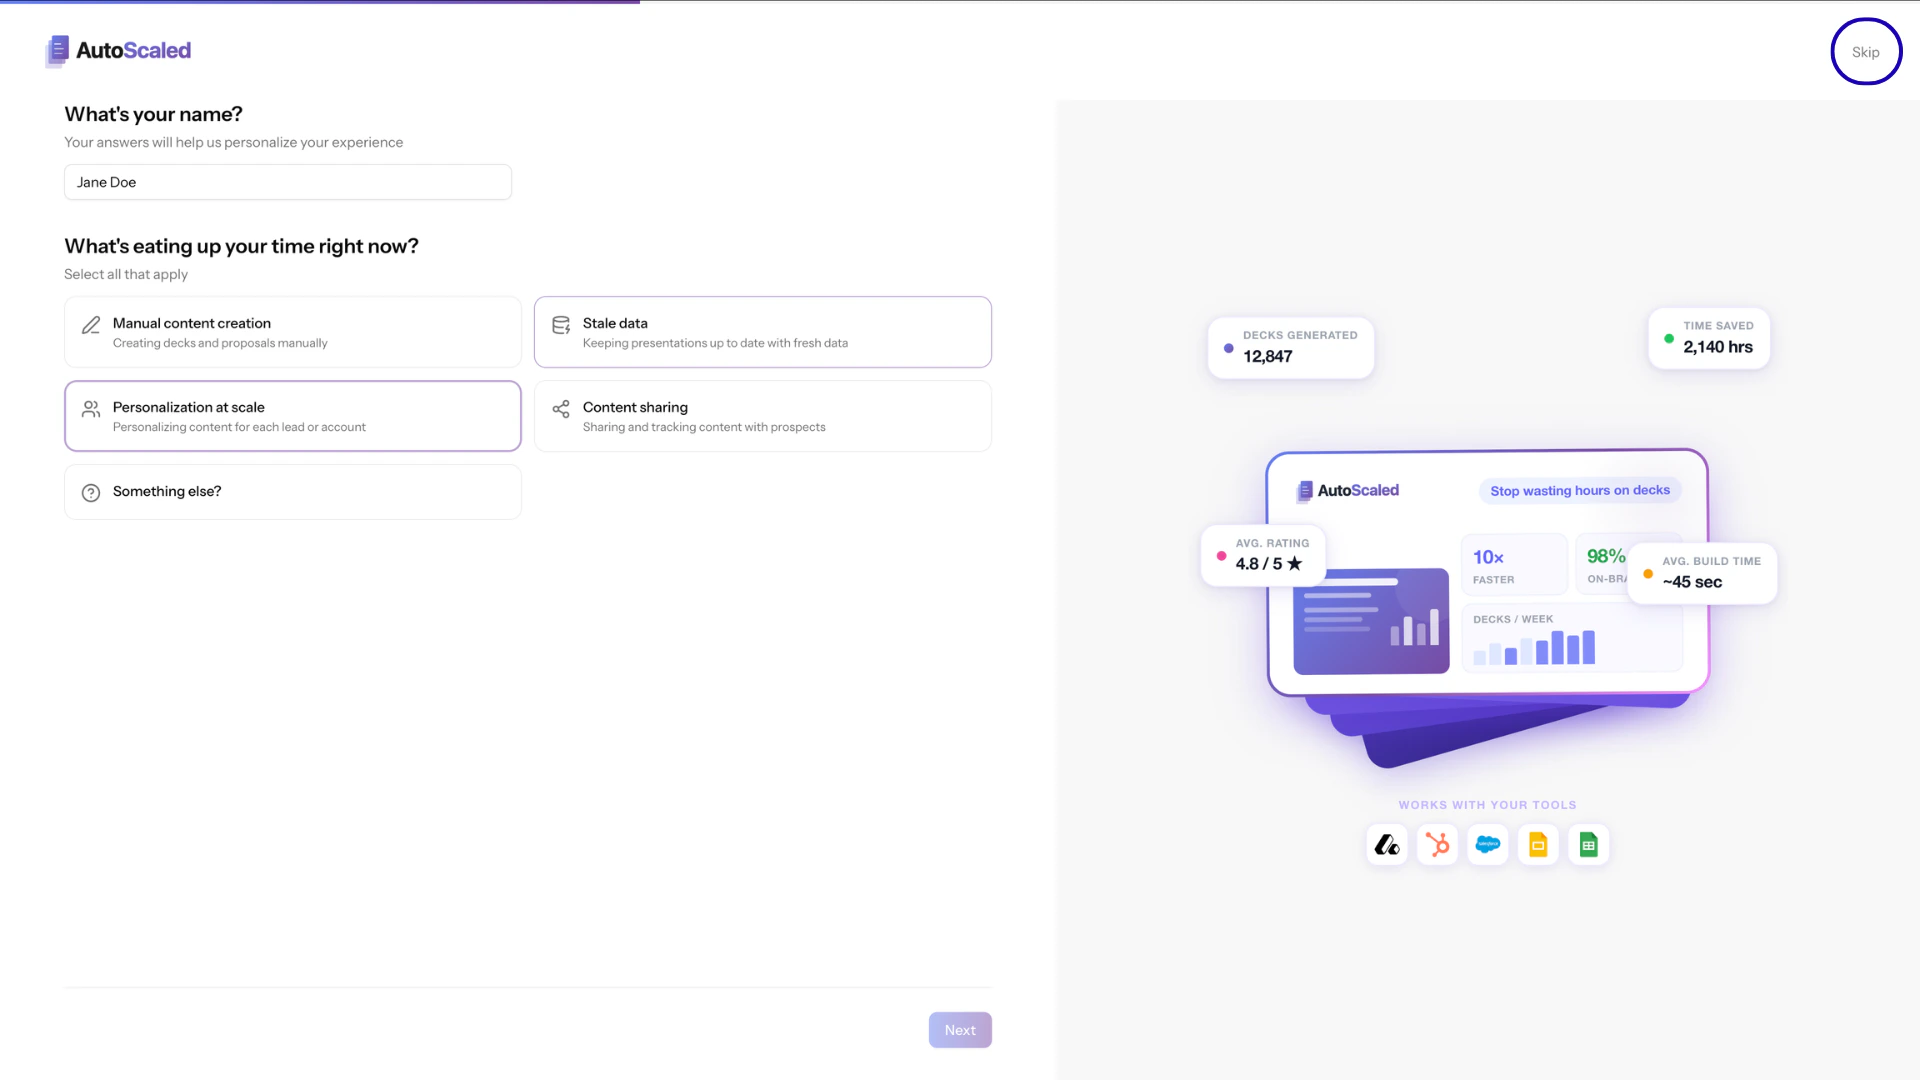

AutoScaled Setup Help Tool
After completing the onboarding wizard, you will be redirected to the main dashboard. In the left bottom corner you will find the Setup Help Tool. This tool is designed to get you started with AutoScaled and contains three steps.

Setup Step 1 - Connect your Data Source
The Connect a Data Source step walks you through how to connect your first CRM or spreadsheet to AutoScaled.Setup Step 2 - Create Your First Workflow
The Create Your First Workflow step guides you from start to finish through setting up your first personalization automation workflow on AutoScaled. You will get to use our agent, scheduling options and get a feel of how easy it is to build content automation workflows on AutoScaled.Setup Step 3 - Invite Your Team
The Invite Your Team step explains how to use AutoScaled’s organizational capabilities such as managing your credits, inviting other team members and sharing workflows with others in your organization.AutoScaled Help During Onboarding
AutoScaled is intentionally built to be a self-serve platform. This means 90% of our users do not require support as our user interface is easy to navigate and simple to understand. That said, all users have different use cases and sometimes things might be more complex. To help you during onboarding, you can click the “Get Help” button above your user name and one of our team members will help you get started on AutoScaled.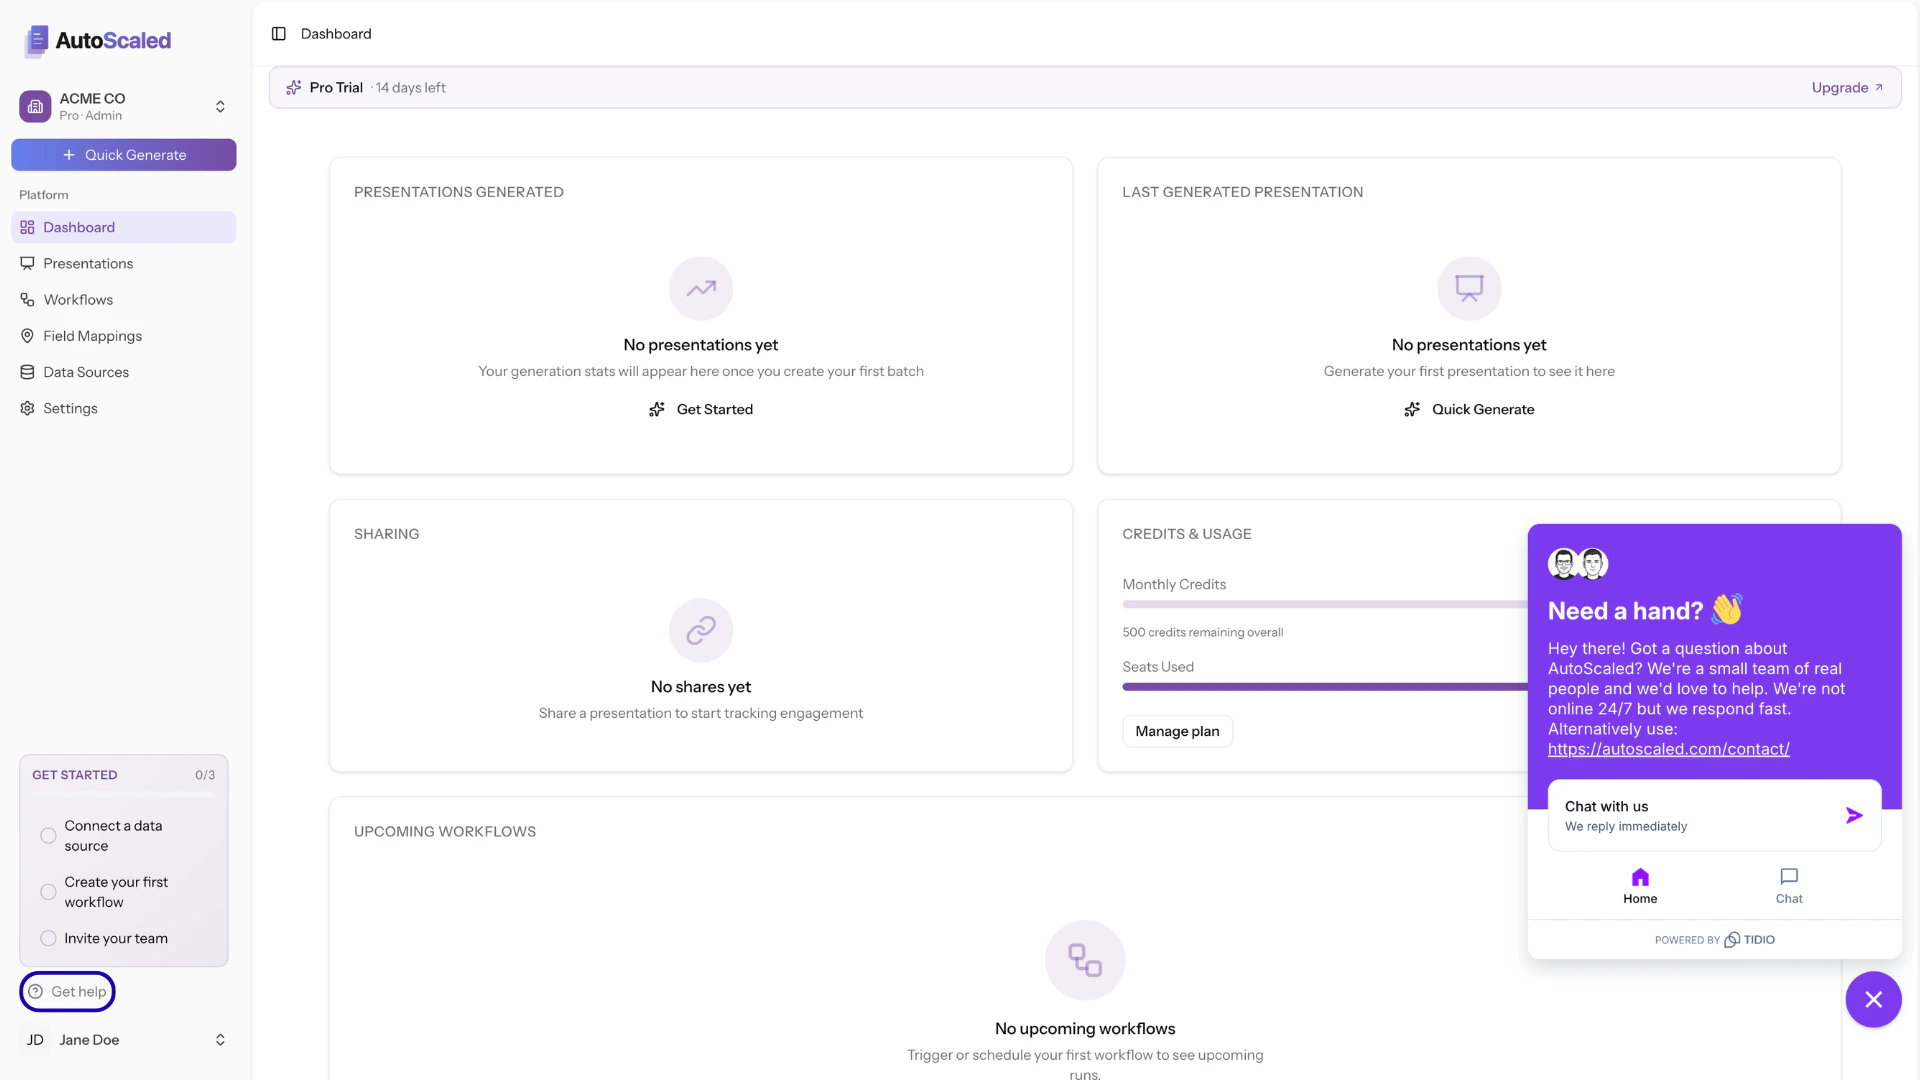
Anything missing? Let us know at [email protected] and we’ll help you out!