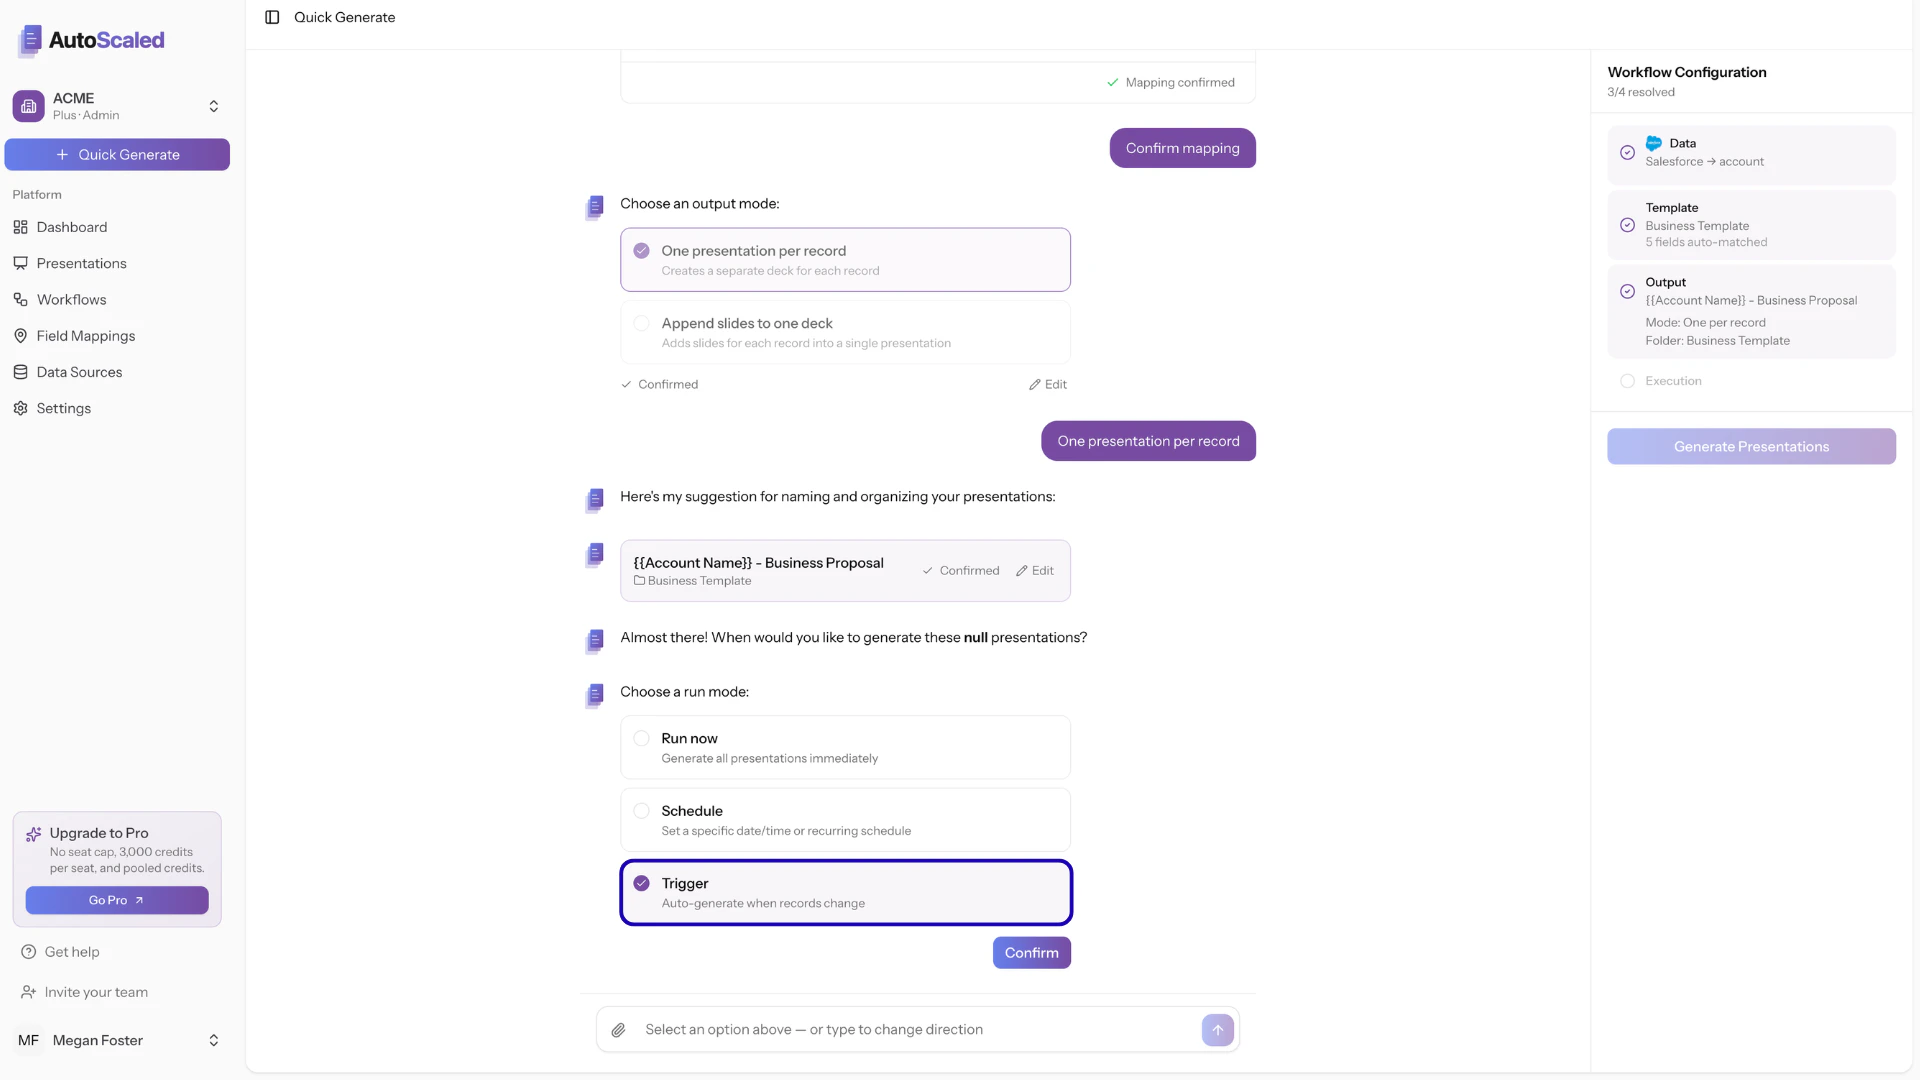
Selecting your Output Mode
AutoScaled allows you to generate presentations in two different output modes:- One presentation per record: generates a separate deck for each record in your CRM or each row in your spreadsheet. This is perfect for client-facing proposals or upsell decks.
- Append slides to one deck: adds slides to an existing deck for each record in your CRM or each row in your spreadsheet. This is intended for business reviews or recurring reporting.
-1.png?fit=max&auto=format&n=2Wmjok9nCet7S4Pa&q=85&s=db73d313a4d644a69a76e36b5e355b79)
The default setting for the append mode is to add the most recent processed records at the top of the slide deck. You can change the order of slides being added in your settings.
Saving your Presentations
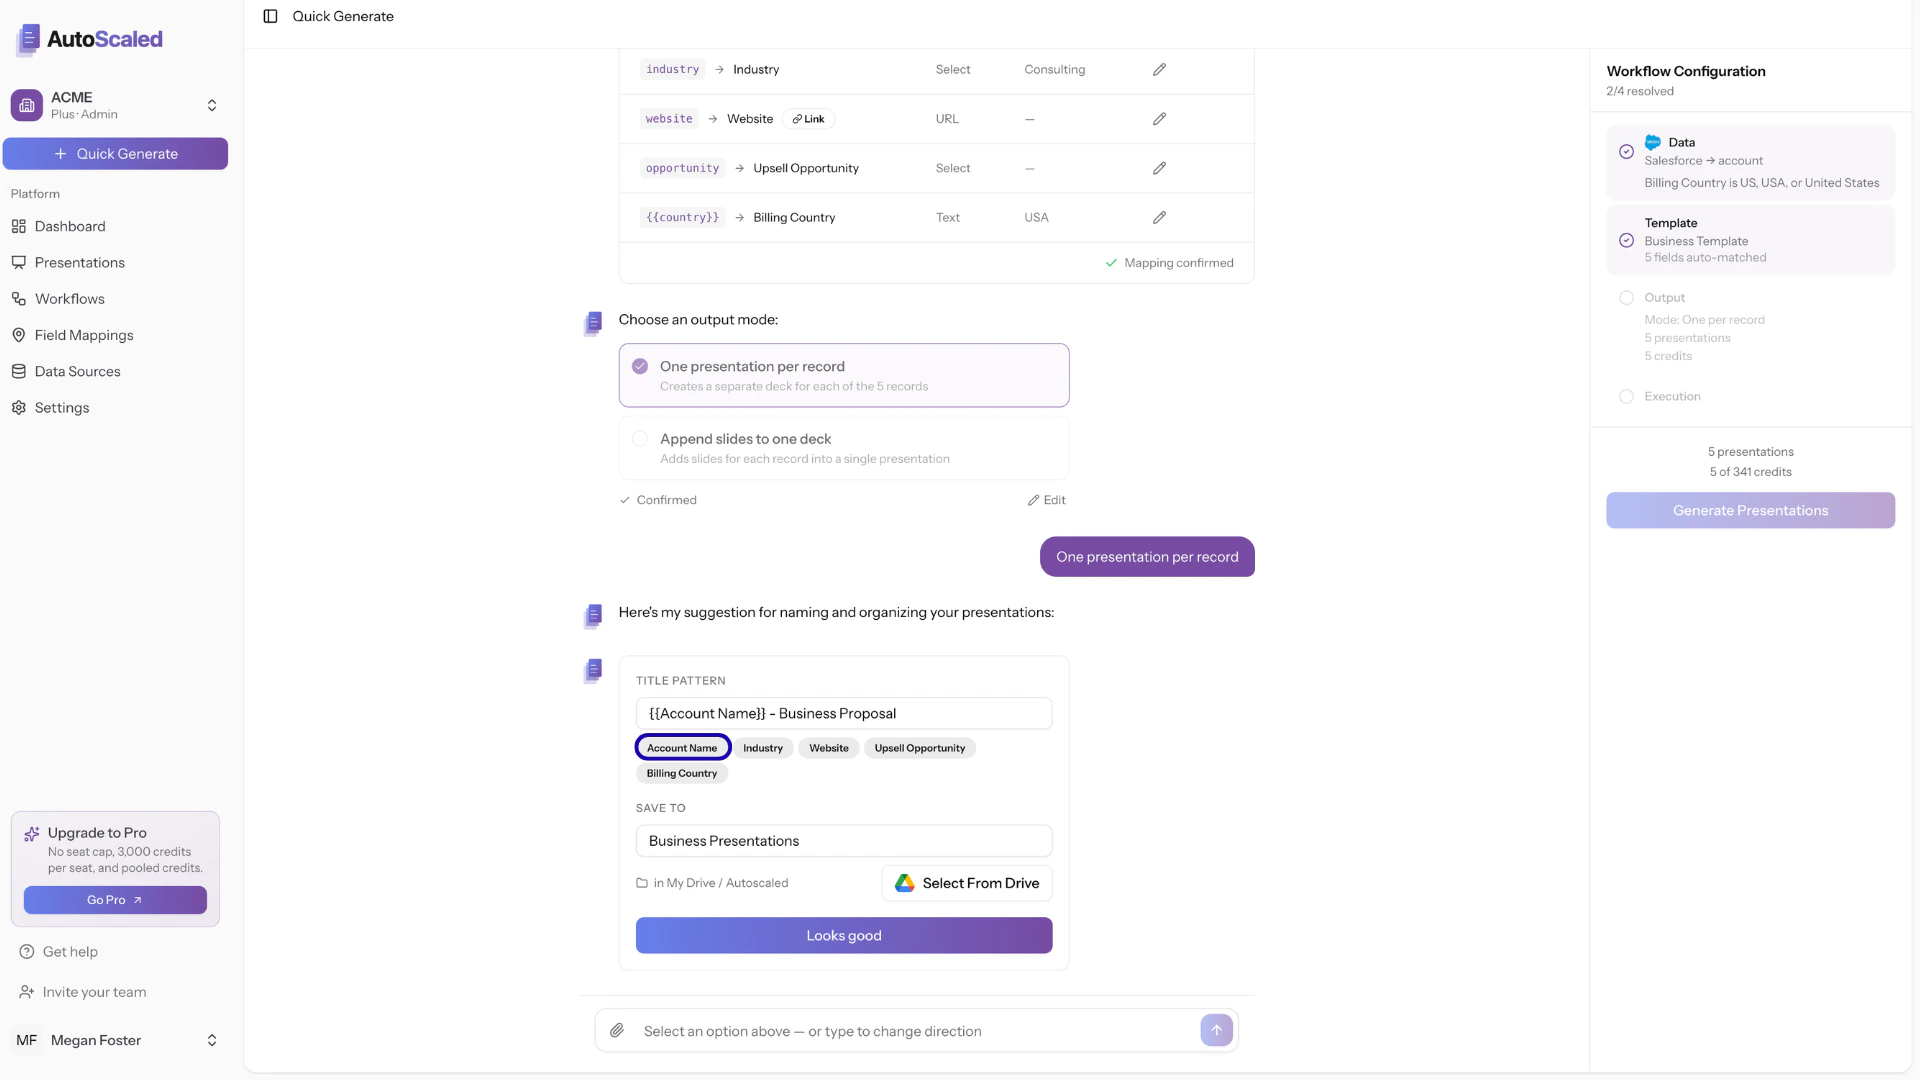
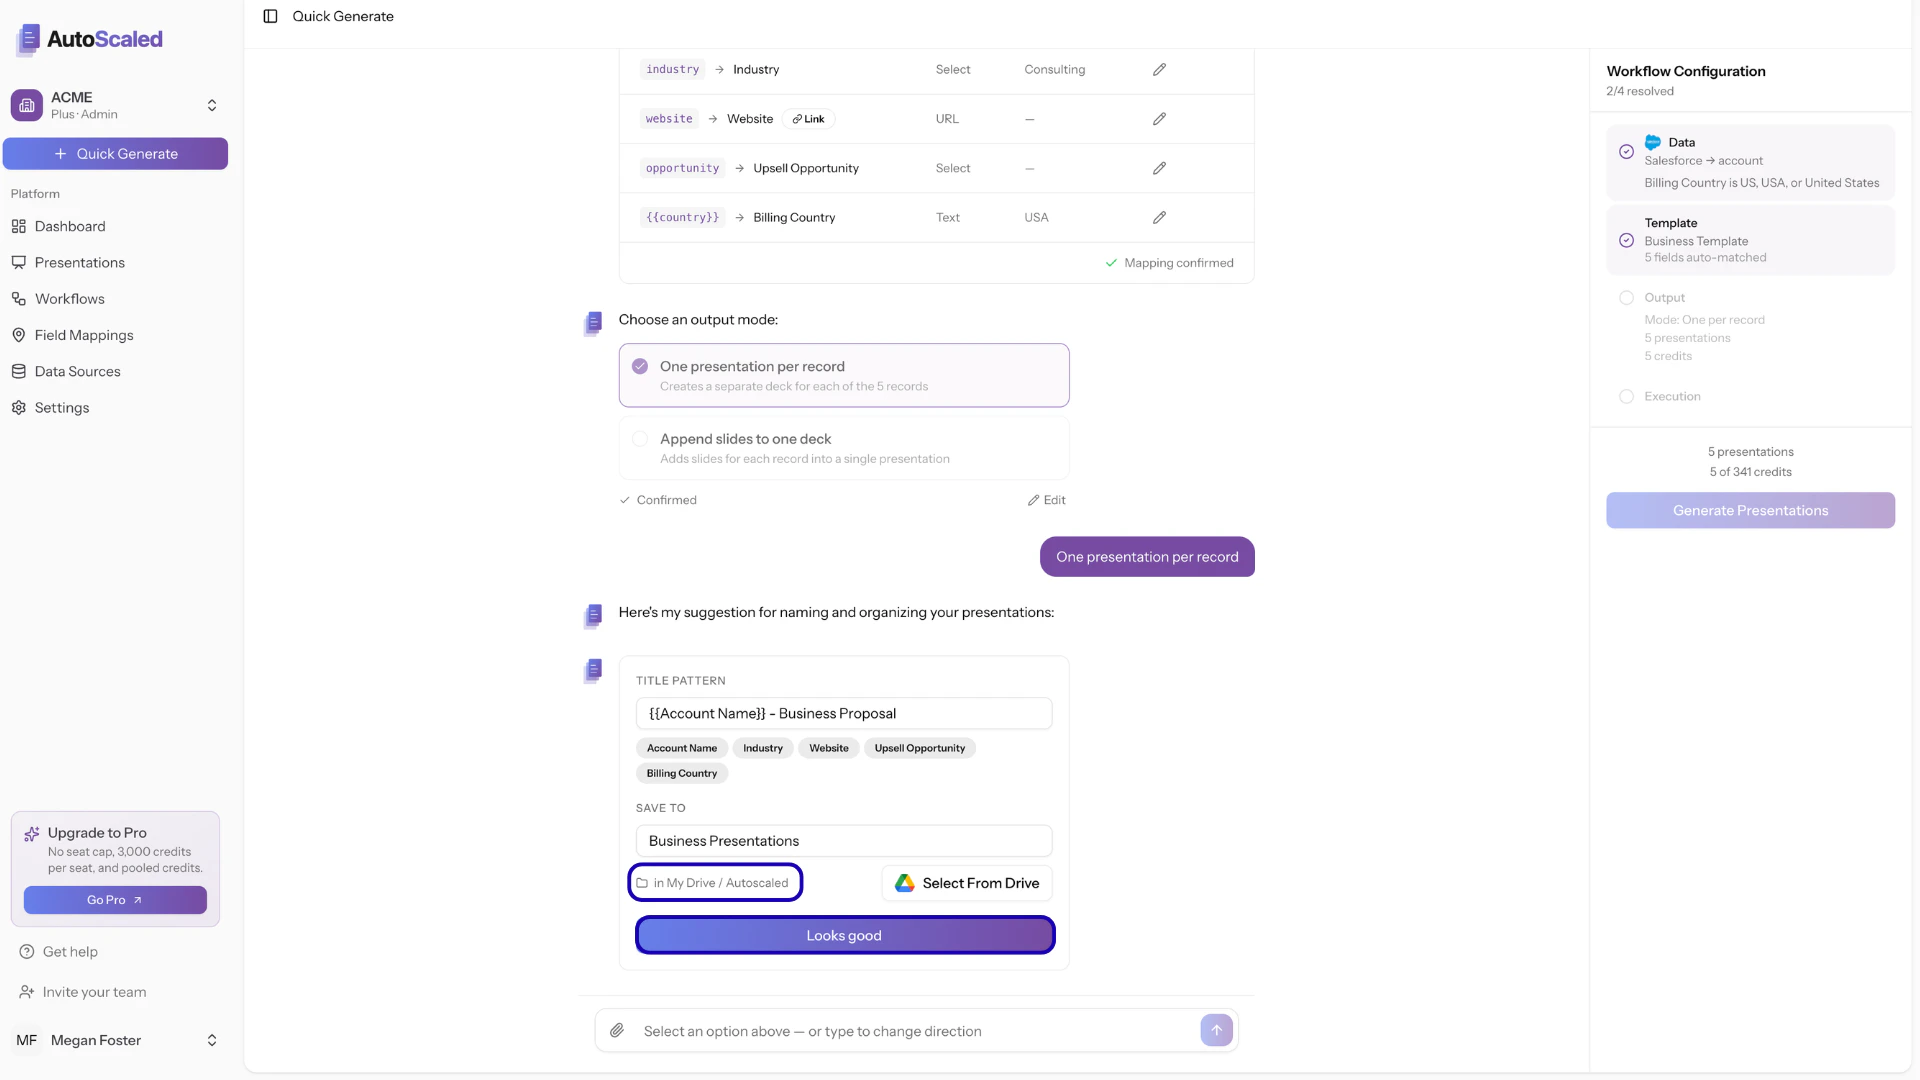
Before running your workflow, you need to decide how to name the presentations and where to store them. In this step you:- Set a dynamic title: using placeholders in the title to make identification easy
- Choose a destination folder: provide a location to store the newly created presentations
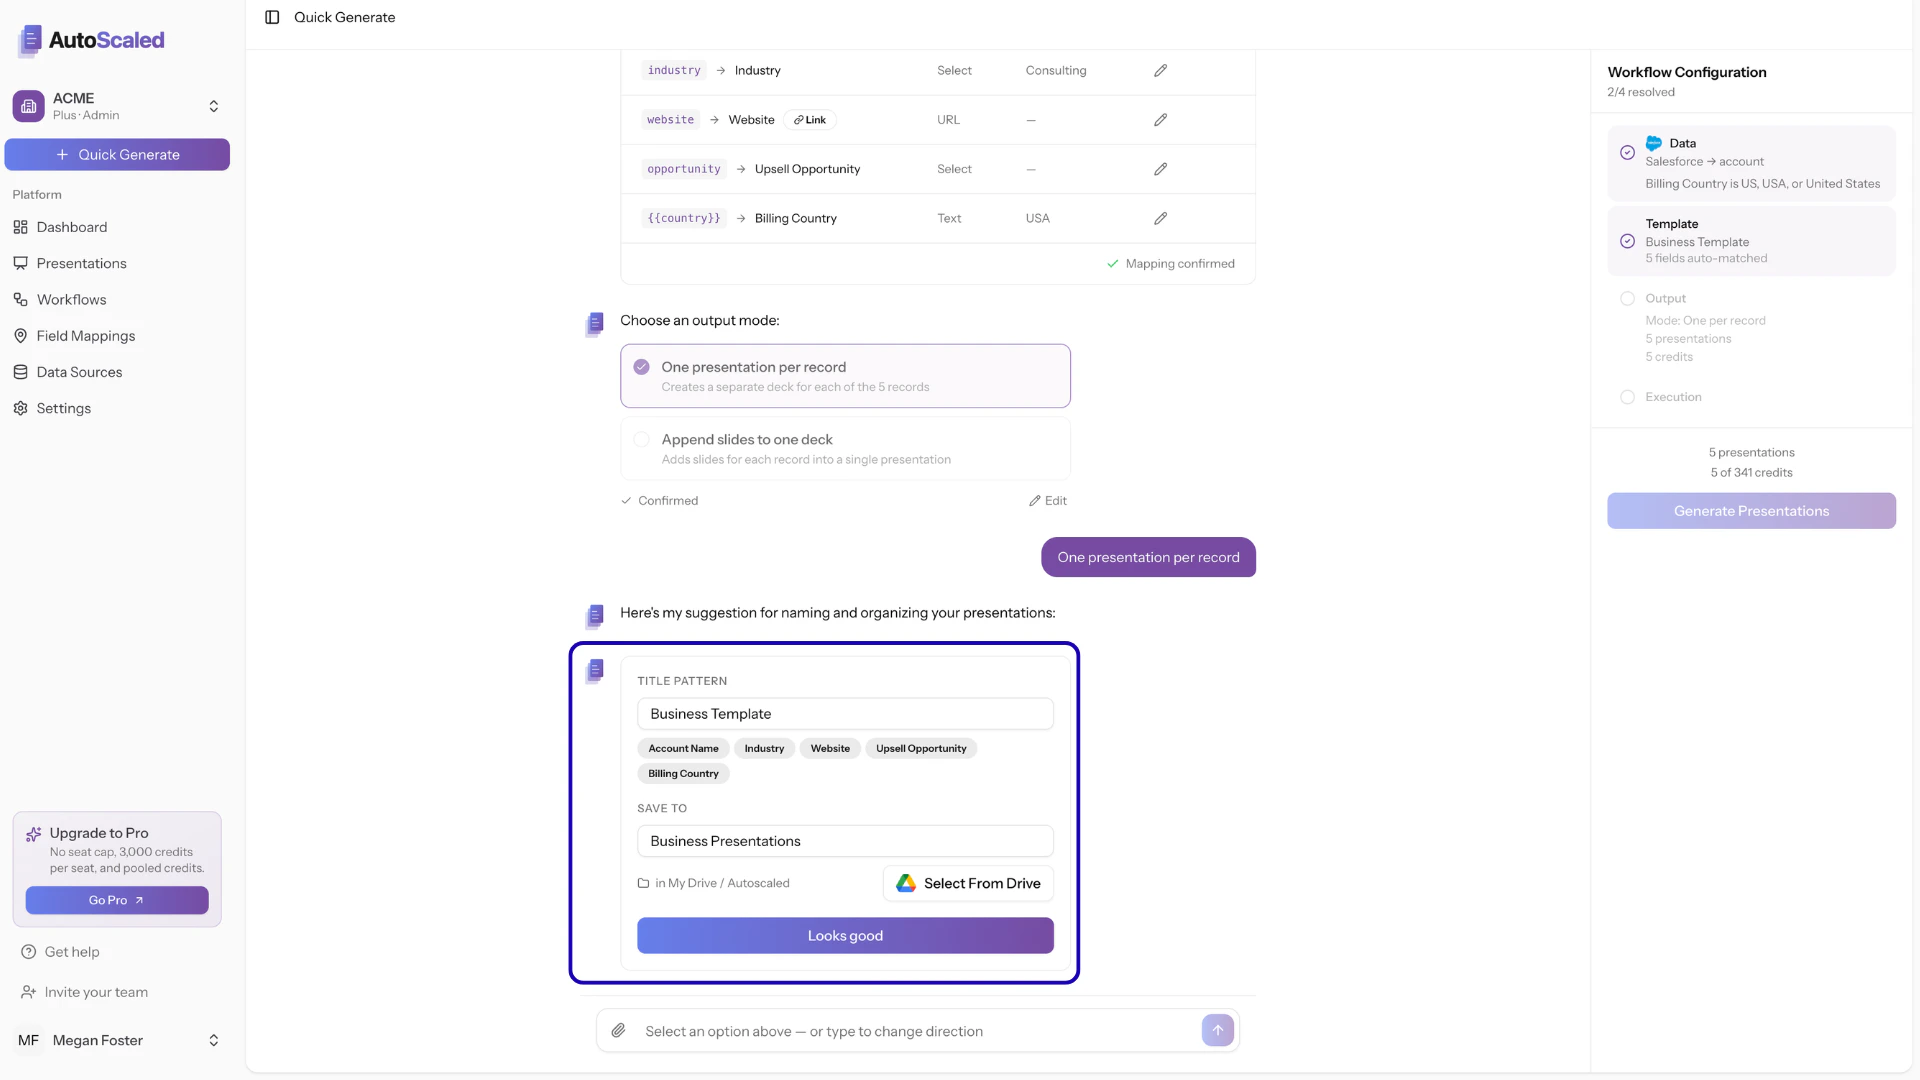
Setting a Dynamic Title
Configure how generated presentations are named. The title supports the same{{placeholder}} syntax as the template itself. For example:
{{Account Name}} — Business Proposal
You can easily add the placeholders by clicking the pills containing your placeholders:
- ACME - Business Proposal
- Dunder Mifflin - Business Proposal
- Stark Industries - Business Proposal
Choosing the Destination Folder
Configure where you want to save your generated presentations. Select a parent folder from Google Drive. For every batch generation, a new folder will be created in this parent folder with the title you provided. A suffix with the date and time is added.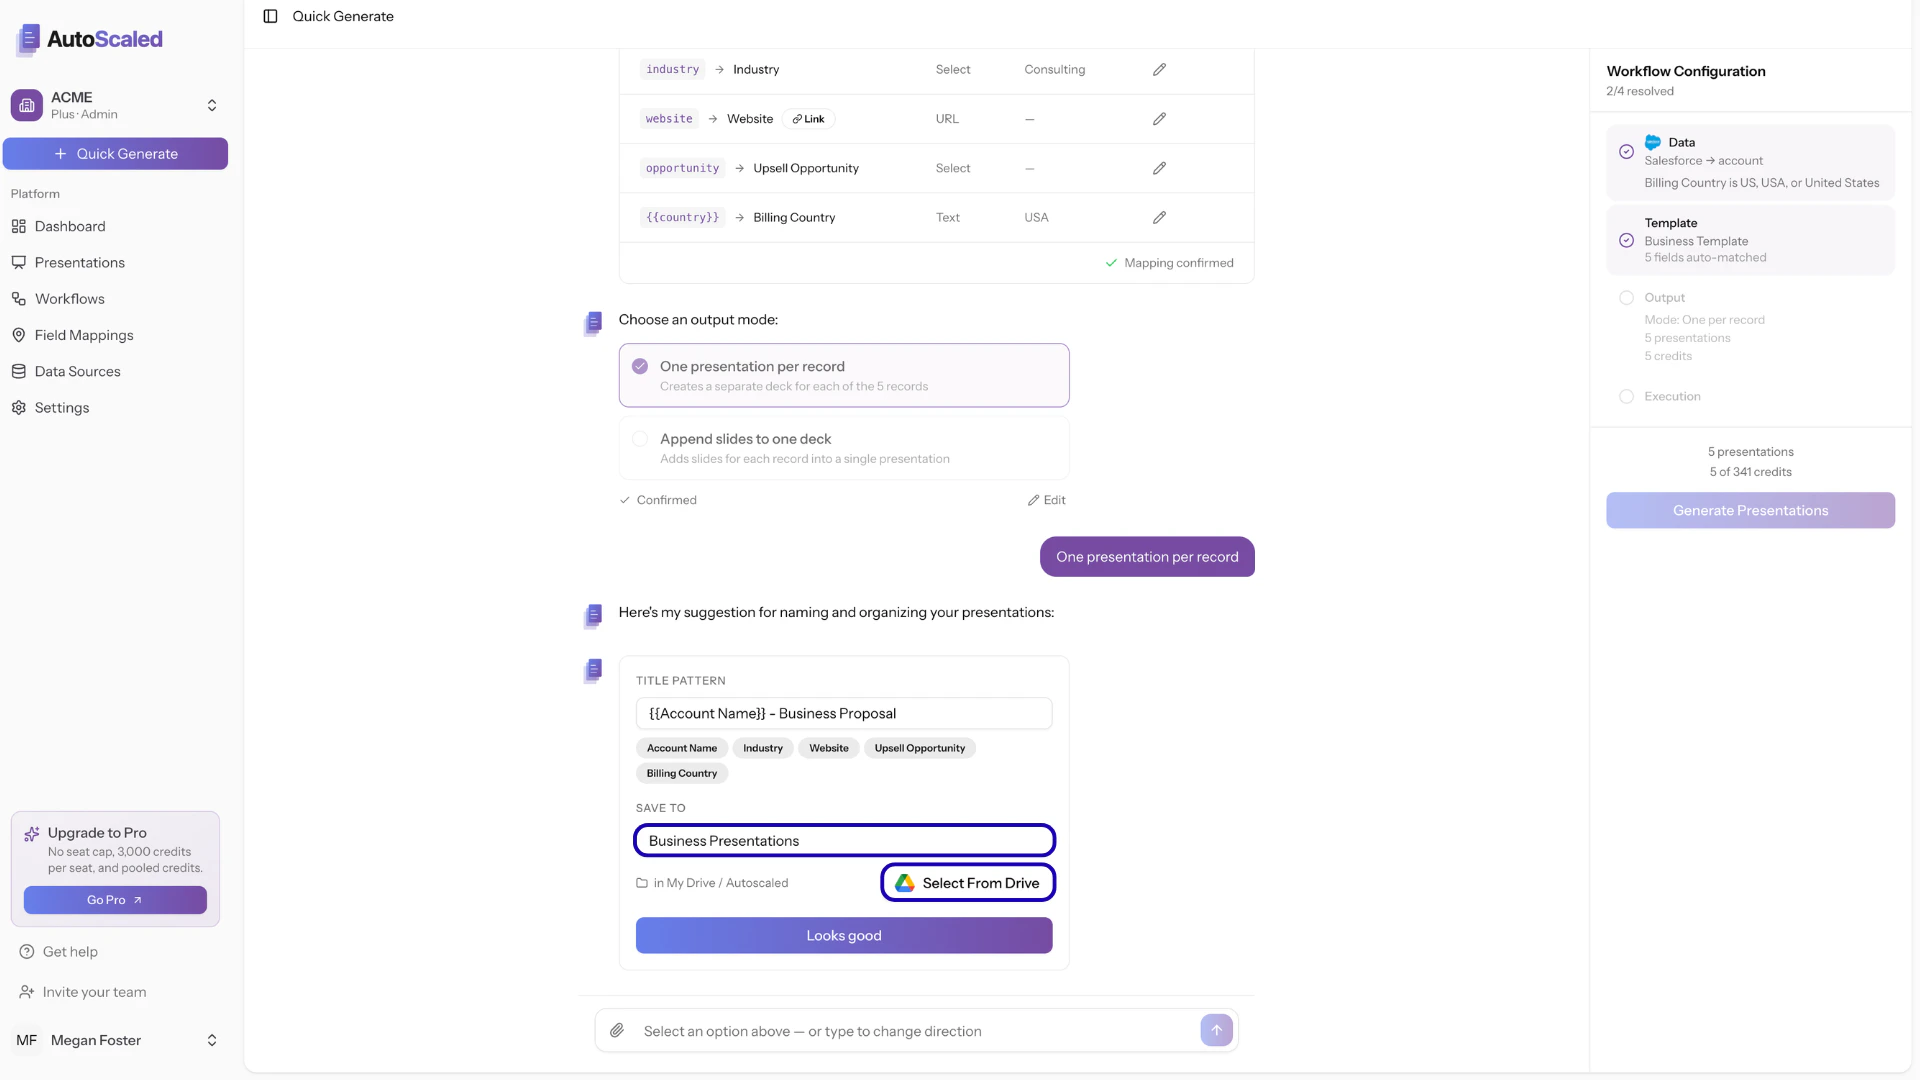
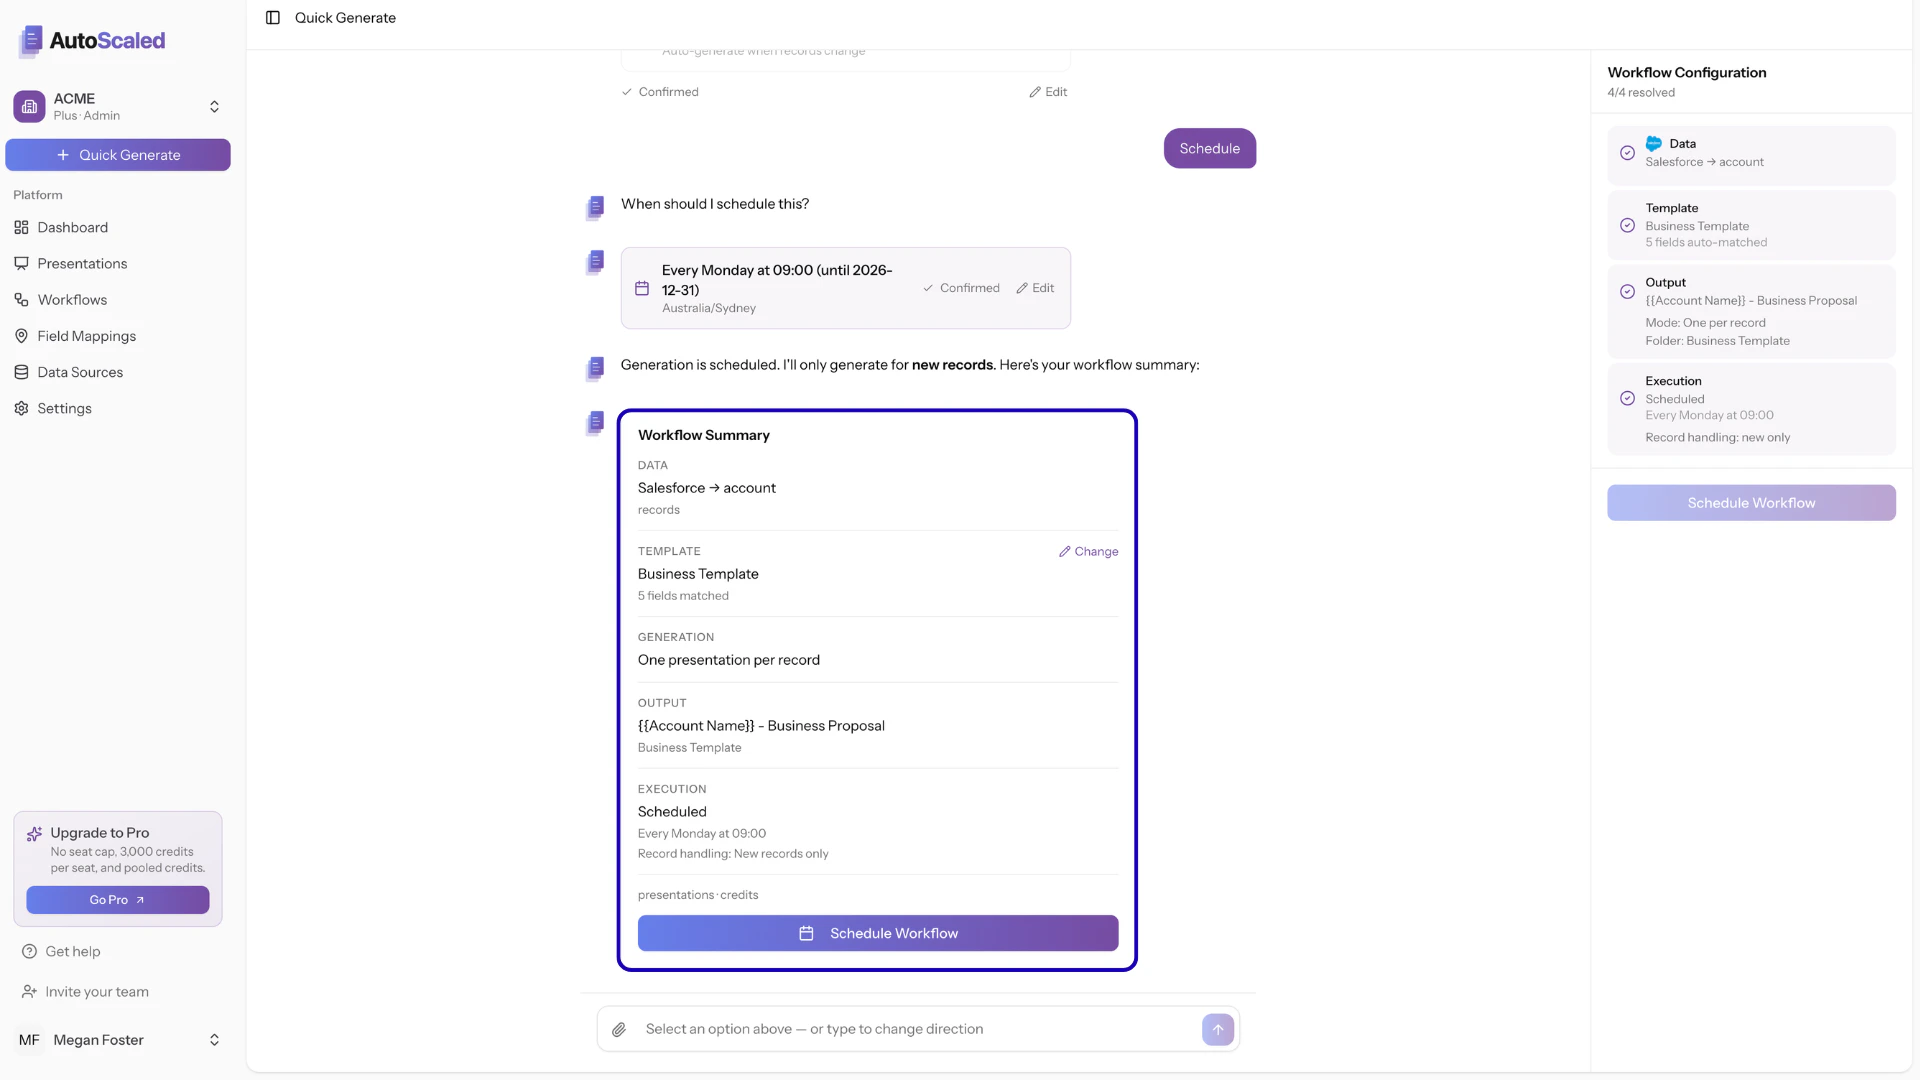
Choosing when to run the generation
AutoScaled allows you to generate presentations in three different run modes:- Run now: generating all presentations immediately
- Schedule: generating presentations at a specific date and time or on a recurring schedule
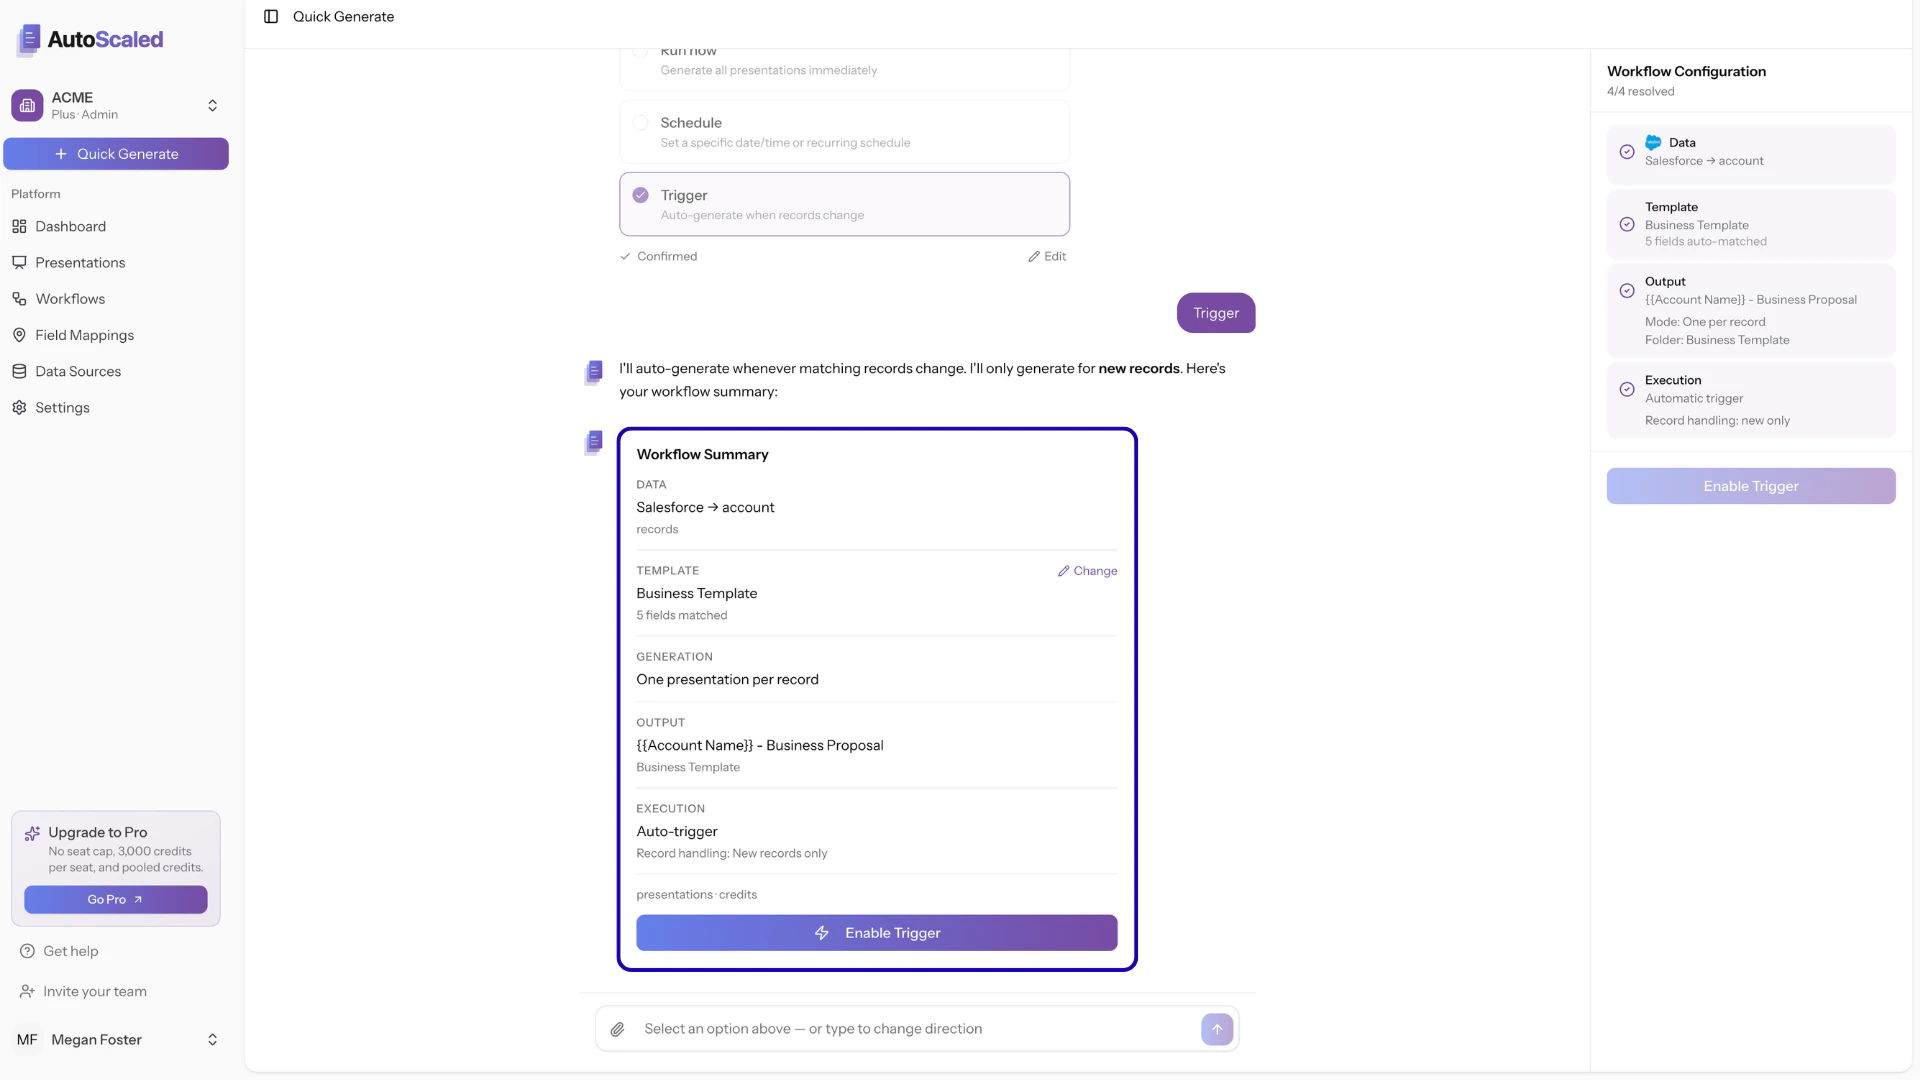
- Trigger: generating presentations when criteria are met in your CRM
-1.png?fit=max&auto=format&n=jdtX-OLmcVPgsGba&q=85&s=e2936b091d231e0272ee7c31ca23bc7f)
Run Now: Generate Presentations Instantly
The run mode “Run Now” generates presentations instantly. Select the run now mode and confirm your selection:-1.png?fit=max&auto=format&n=jdtX-OLmcVPgsGba&q=85&s=a563169d5f8bf8417009e5e0ddf04972)
-1.png?fit=max&auto=format&n=jdtX-OLmcVPgsGba&q=85&s=84403d0b311df8ac452e936d10310011)
-1.png?fit=max&auto=format&n=jdtX-OLmcVPgsGba&q=85&s=99ca1c86e88c3467a8fa5da16d2b3fa5)
Generation Process
To read more about the generation process—including how to emergency-stop a run, understand different statuses, and track progress—open the Generation Process page in the product documentation.
Test Runs: Test Generation Before Running A Full Batch
In the last step of your workflow setup, there is an option to do a test run. The test run is limited to 5 records and allows you to preview how data will be populated in your slides. While stopping a generation is a good last resort, it’s better to validate all before running a workflow. When not sure, do a test run first:-1.png?fit=max&auto=format&n=IaU_97P2Eq6BQDCk&q=85&s=c2bbc100d6df706652f9e29e380be81e)
-1.png?fit=max&auto=format&n=IaU_97P2Eq6BQDCk&q=85&s=b7bc5245d6c1f0212012237fc87d3878)
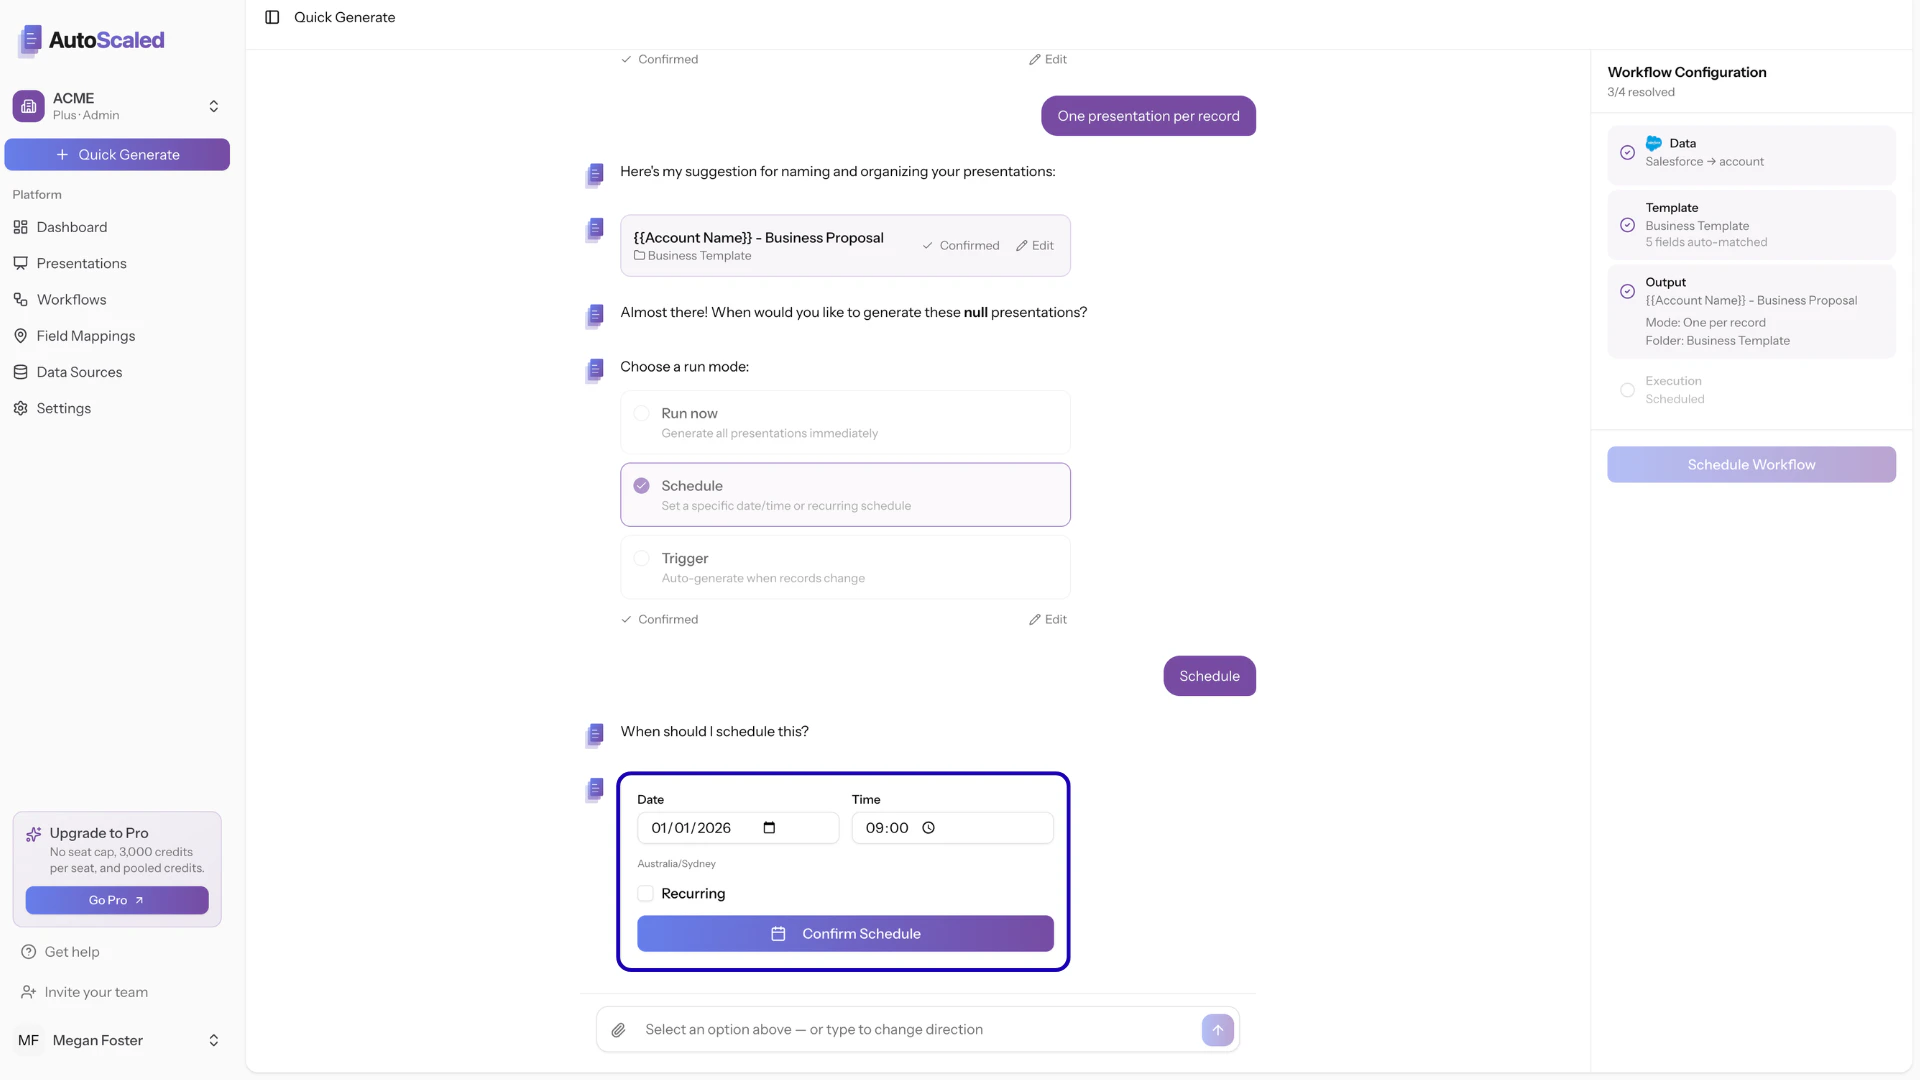
Schedule: Schedule Decks or Make Them Recurring
The run mode “Schedule” generates presentations at a set moment in time. There is also an option to schedule recurring presentations. Select the schedule mode and confirm your selection: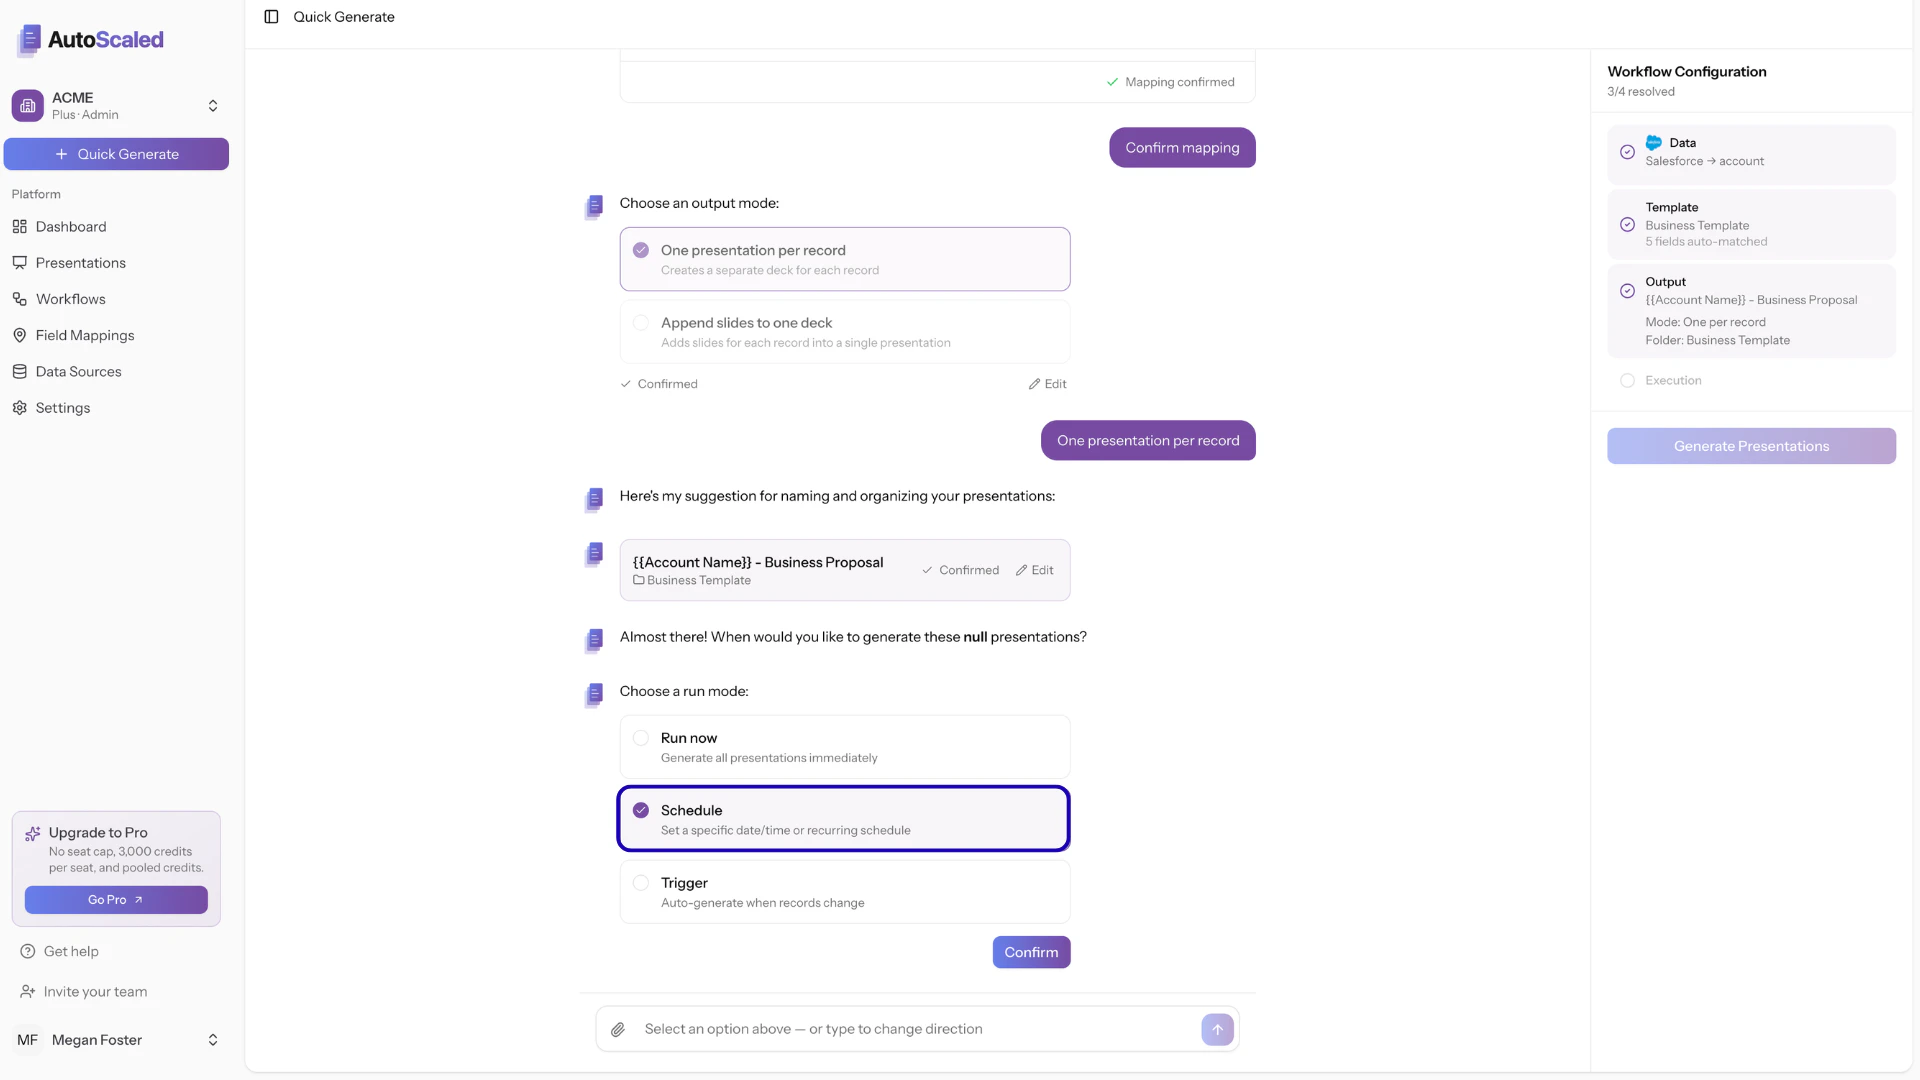
- Date: the start date when the automation will run the first time
- Time: the time of day the automation should run. This is based on your timezone
Daily Schedule
Daily Schedule
Presentations are generated daily at the time you’ve definedIn the example above: presentations will be generated daily at 9 AM.
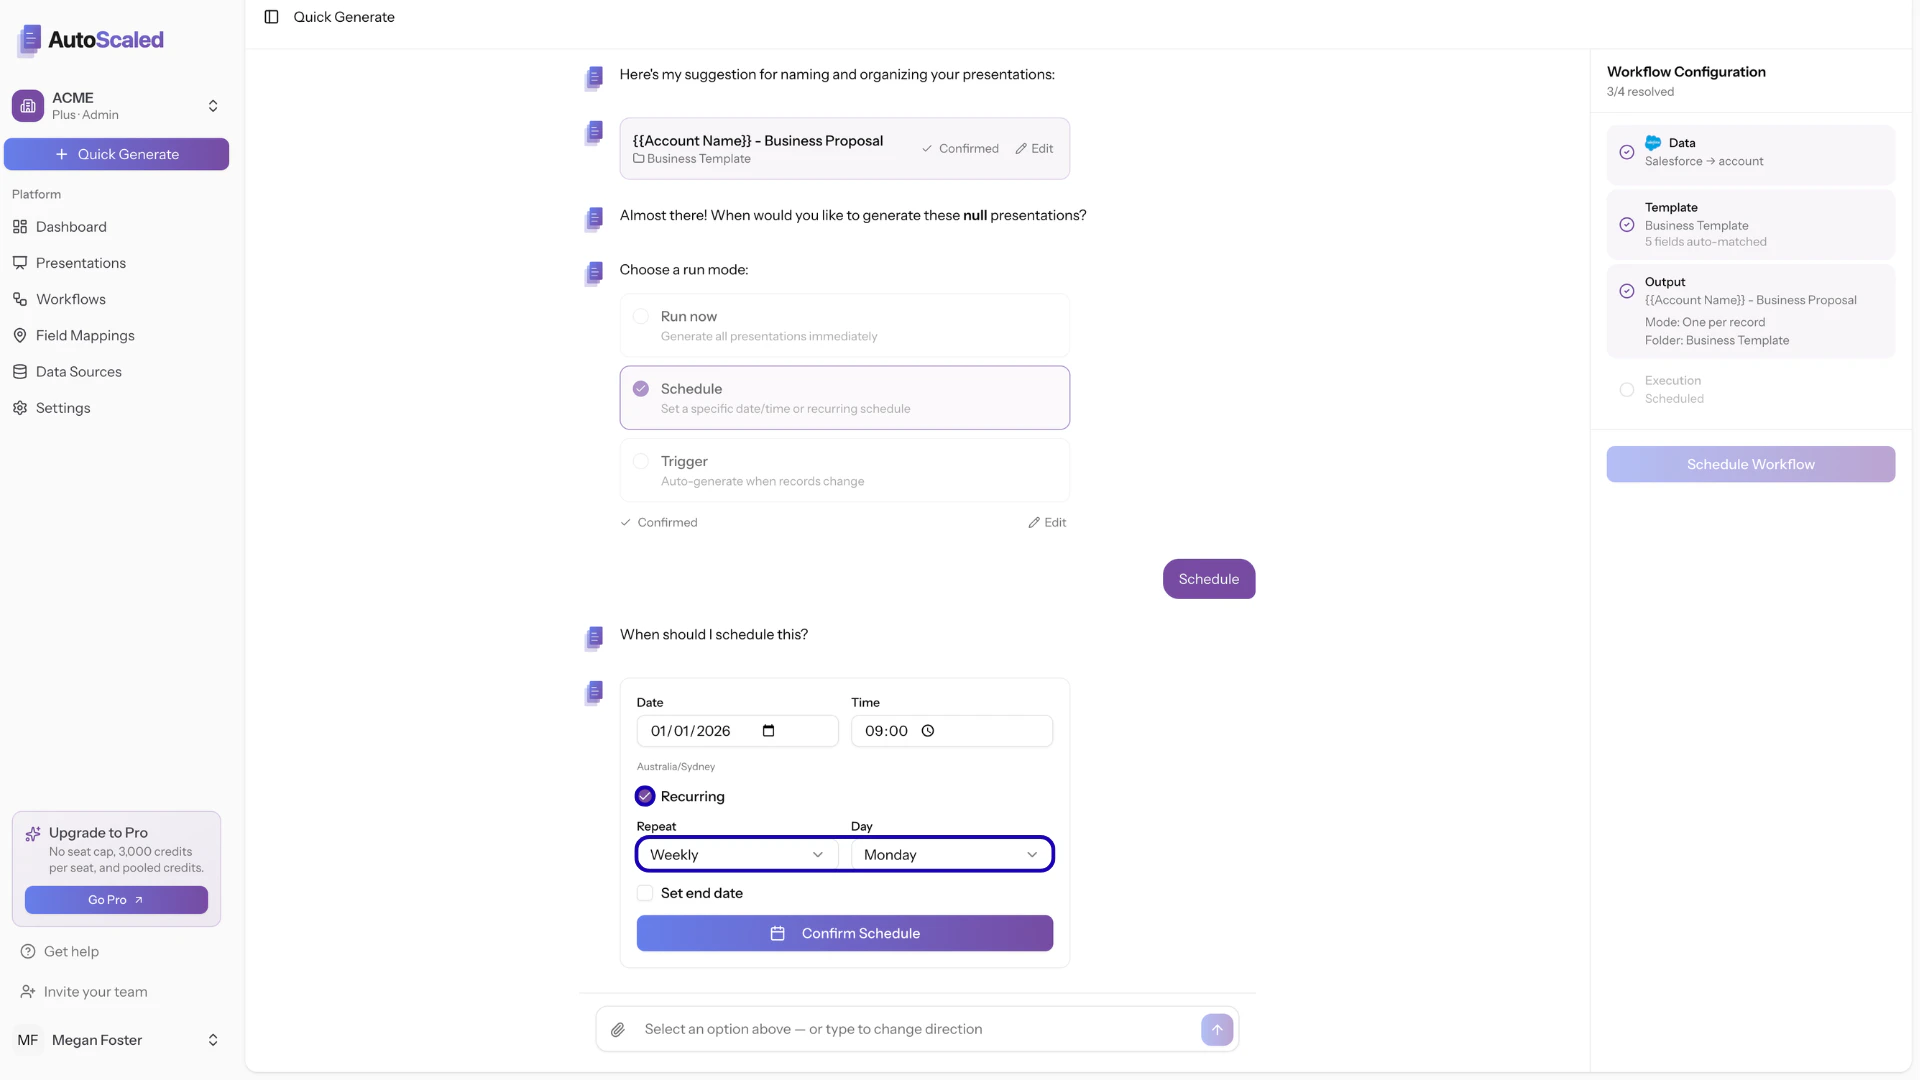
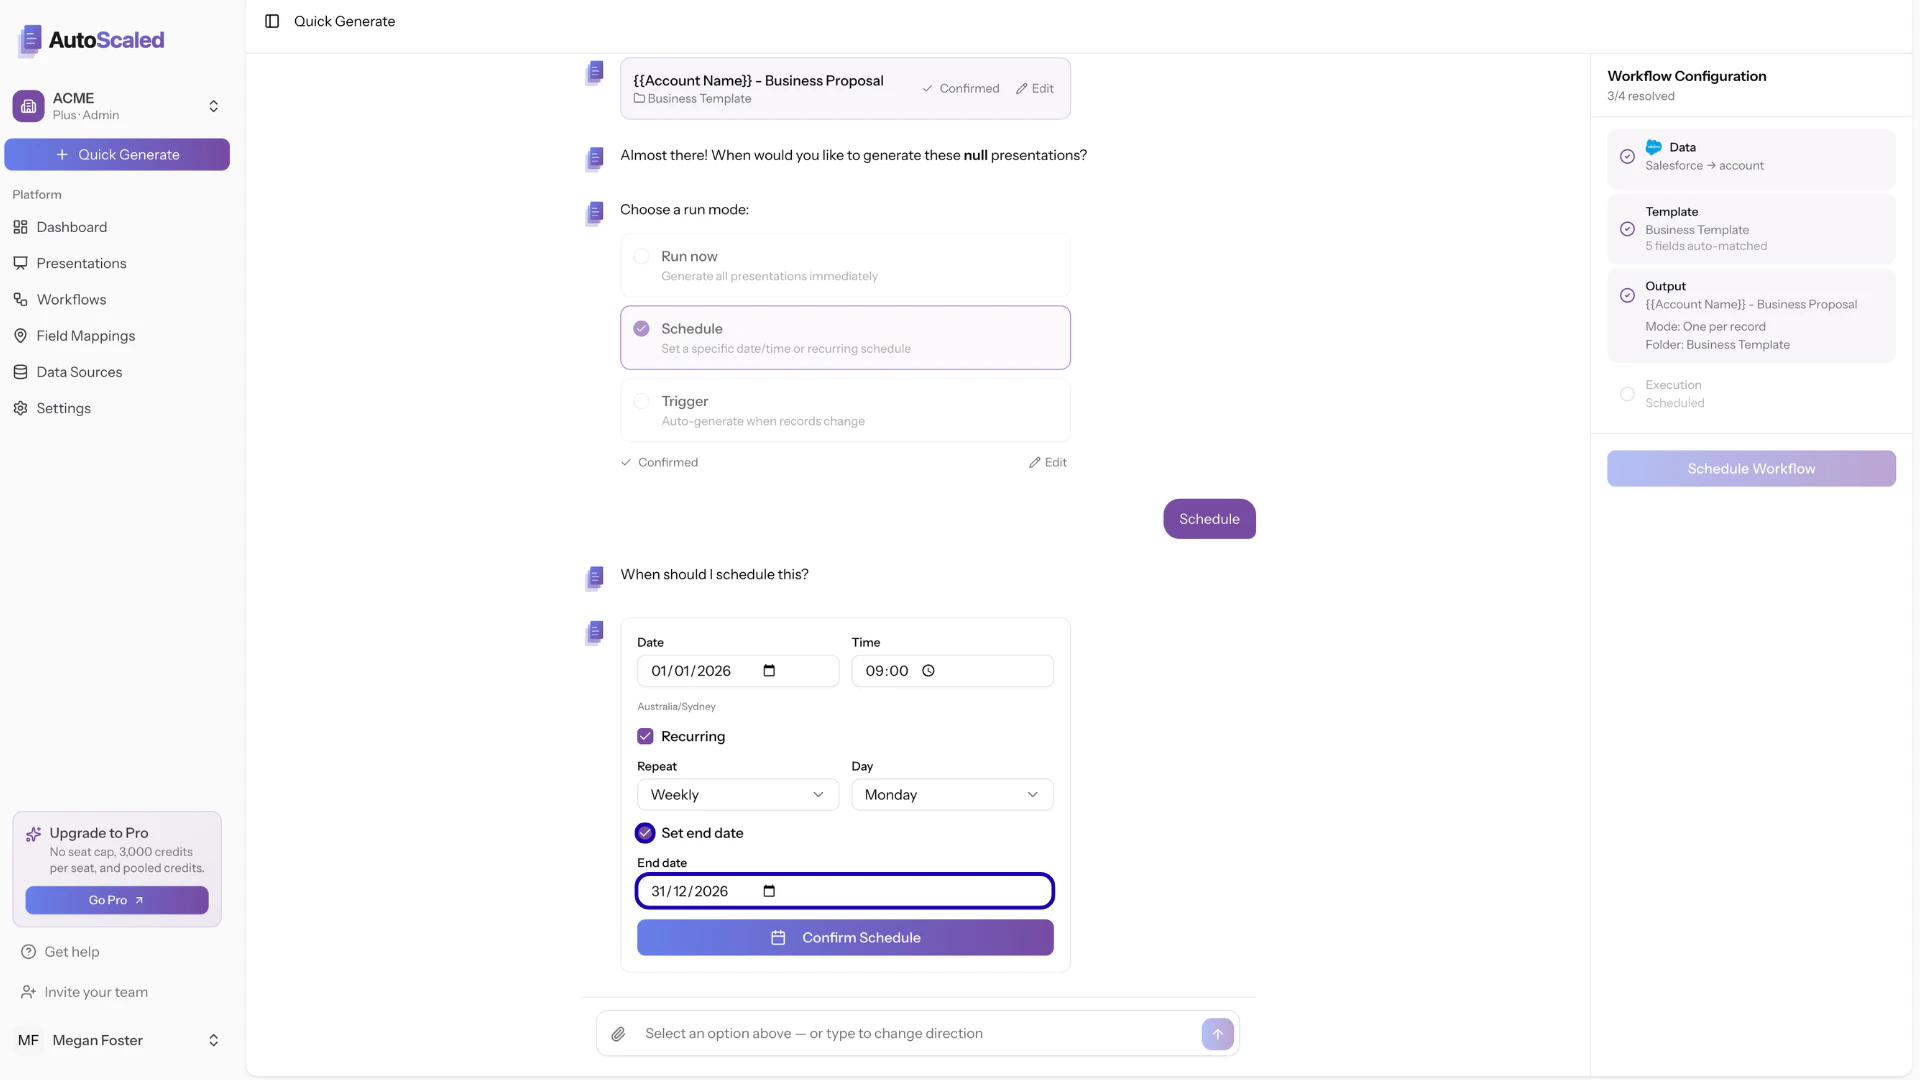
Weekly Schedule
Weekly Schedule
Presentations are generated weekly at the time you’ve defined. You can select on which day of the week the presentations are generated. In the example below: presentations will be generated weekly on Monday at 9 AM.
Monthly Schedule
Monthly Schedule
Presentations are generated monthly at the time you’ve definedIn the example above: presentations will be generated monthly at 9 AM on the same day of the month (e.g. 02/01/2026, 03/01/2026).
Trigger: Trigger Presentations When Data Changes
The run mode “Trigger” generates presentations when filter criteria are met. These criteria are the same as the criteria you’ve set to select the right records. There are two ways criteria can be met:- New records in your CRM: a new record in your CRM was created that meets the criteria.
- Existing record updated in your CRM: an existing record in your CRM that previously did not meet the criteria now meets it
A new company is created in Salesforce through a lead form. The company is based in the United States. It now meets the criteria from the example above, so a deck is created for this record.
An existing record has its location updated to “USA”. It now meets the criteria from the example above, so a presentation is generated for this record.To activate a trigger simply select the run mode “Trigger”:
Anything missing? Let us know at [email protected] and we’ll help you out!